This buddy I’m associated with in a car association, Adam, once astounded me with a casual remark: “I derive more pleasure from adjusting my cars than cruising in them.” He was the proud owner of quality vehicles (a BMW and two Porsches). A part of me has always shared that sentiment. However, for some reason, confessing it felt sacrilegious. His statement felt like vindication. I thoroughly enjoy tinkering, which is one of the reasons I’ve been relishing a lighthearted bumper exchange.
A few years back, I purchased this 1998 Mitsubishi Montero in Southern California after a severe collision left me with only one functional hand (temporarily), necessitating the acquisition of a car with an automatic gearbox. Since then, it has become one of my most beloved vehicles. I’ve been utilizing it for escapades and transforming it into a quintessential example of a traditional overland vehicle, with a meticulous selection of specialized accessories.
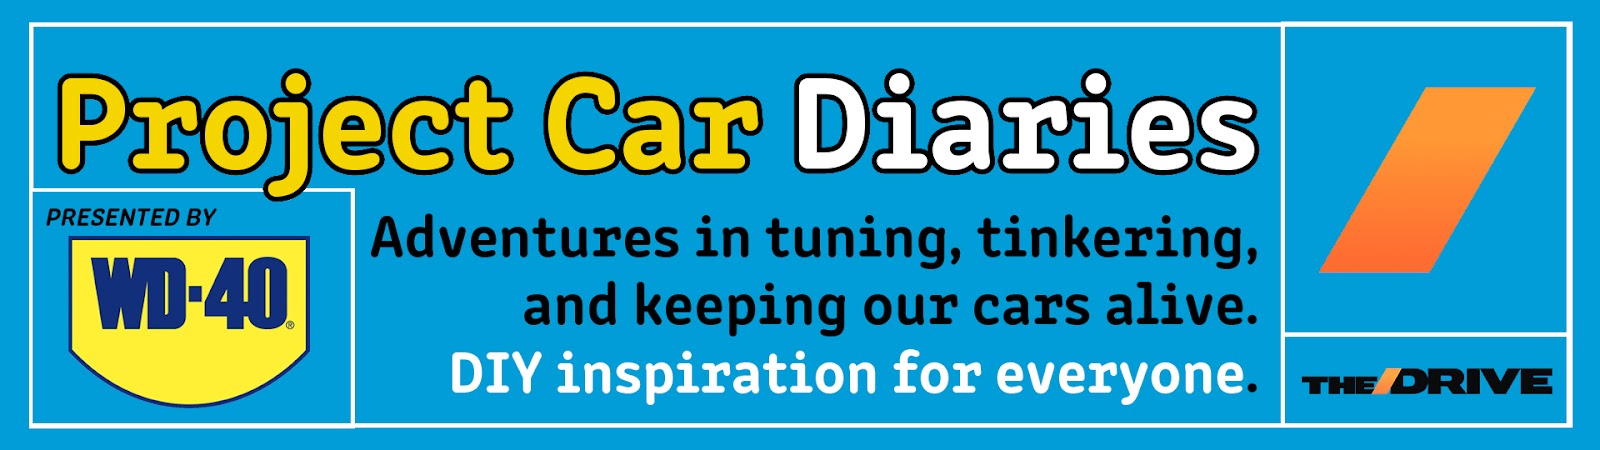
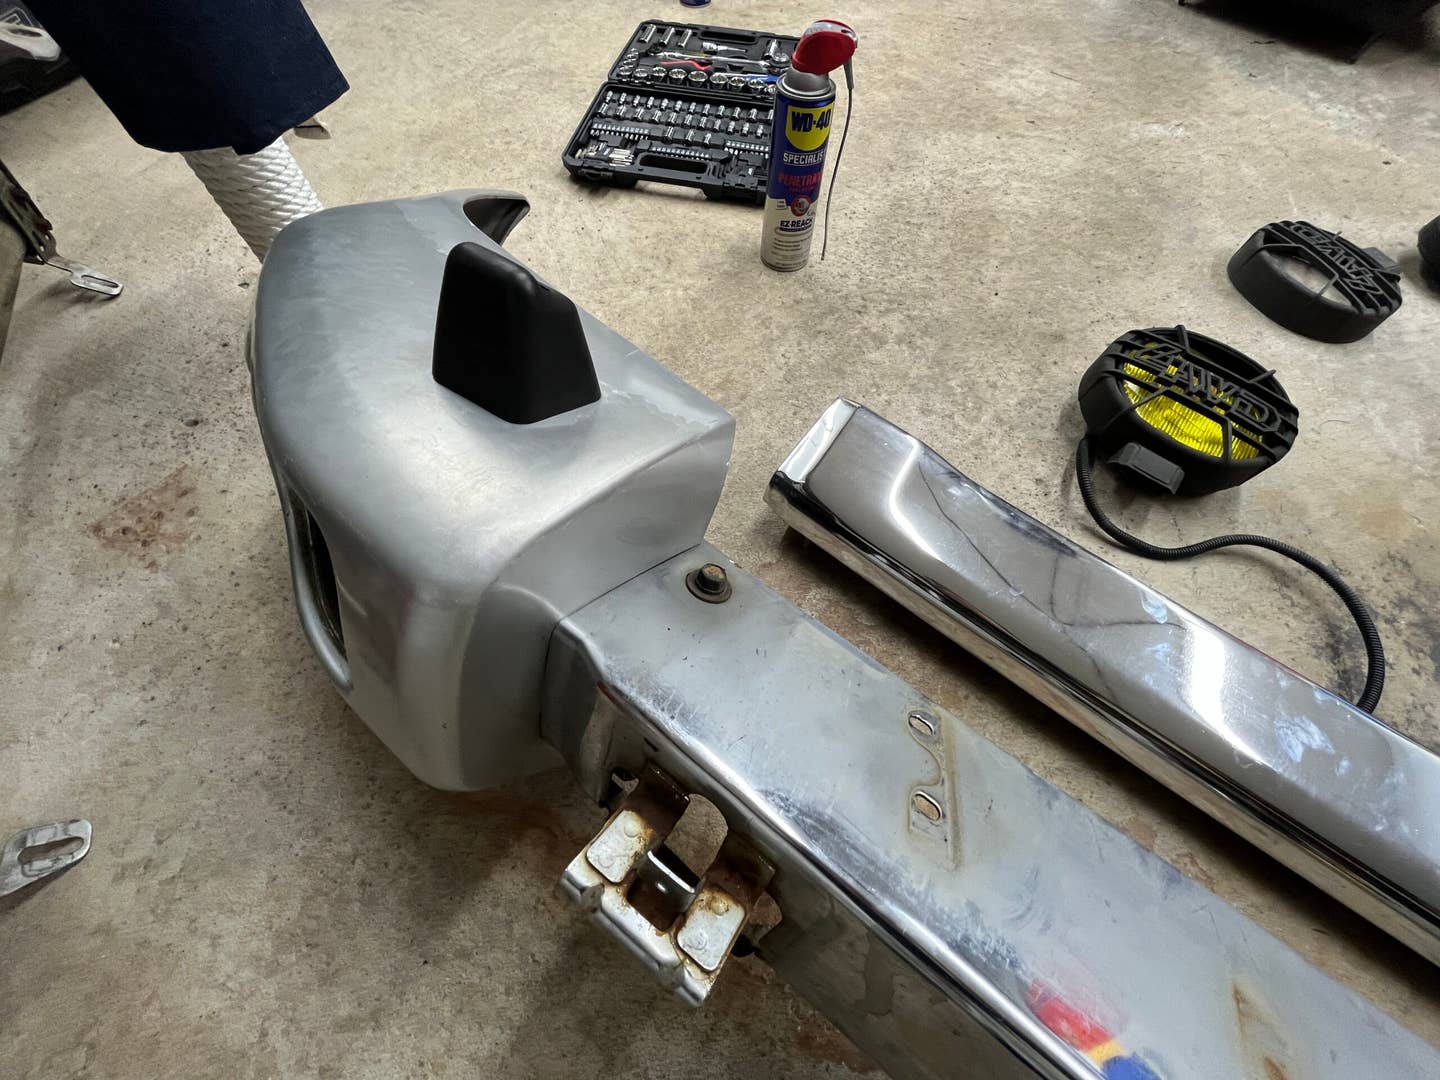
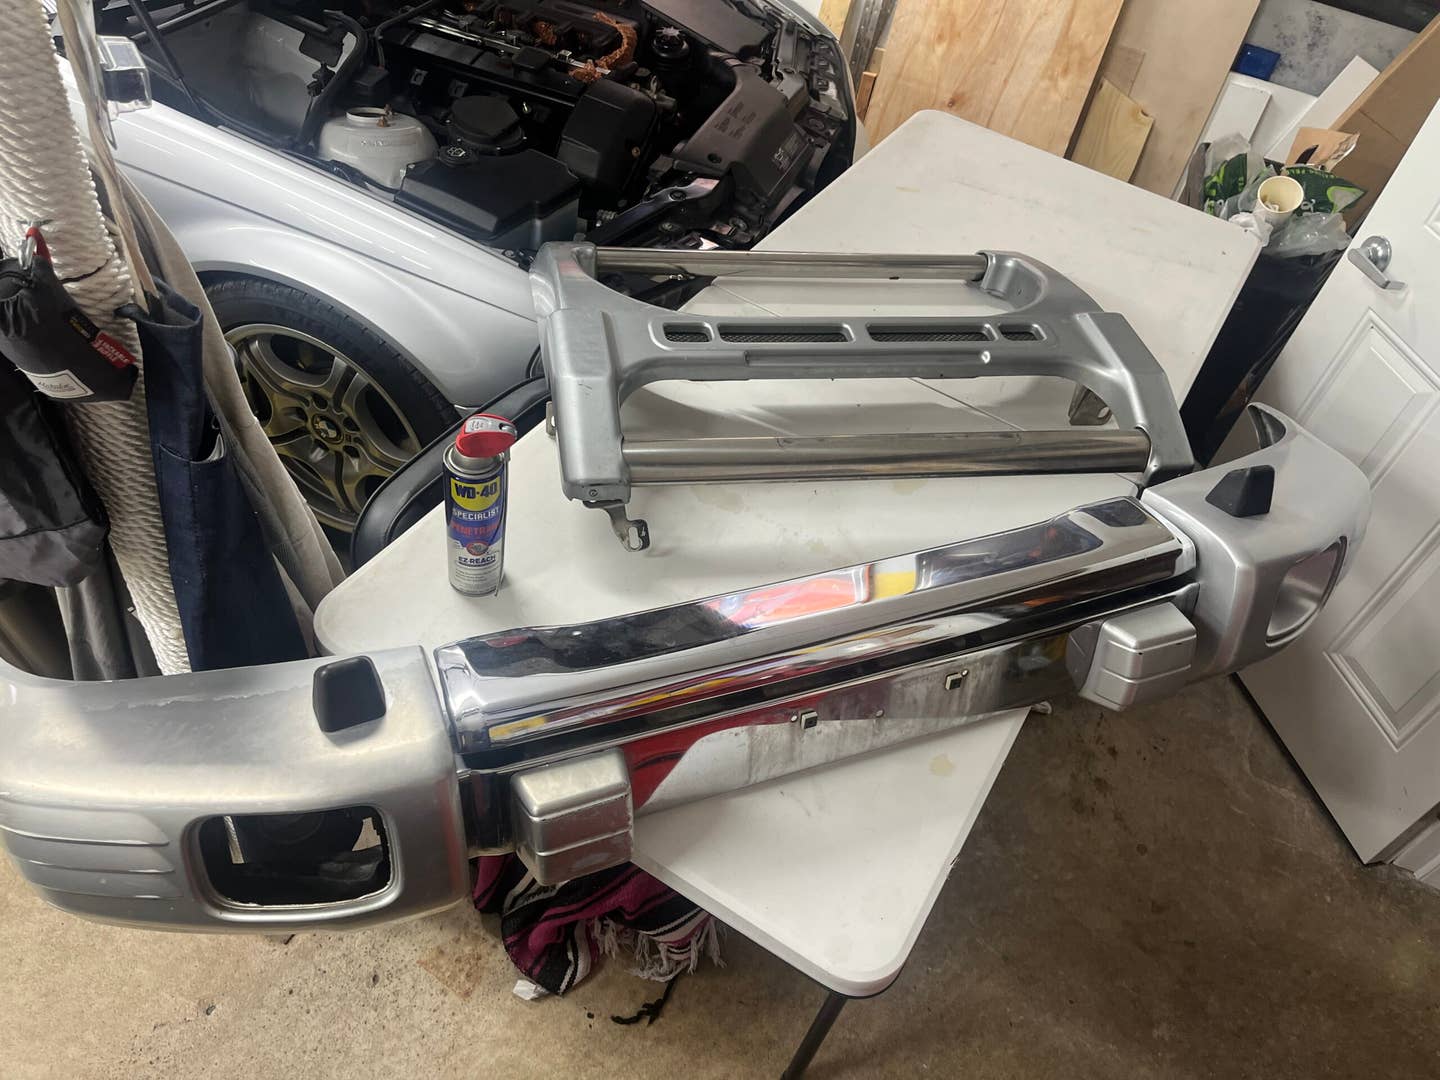
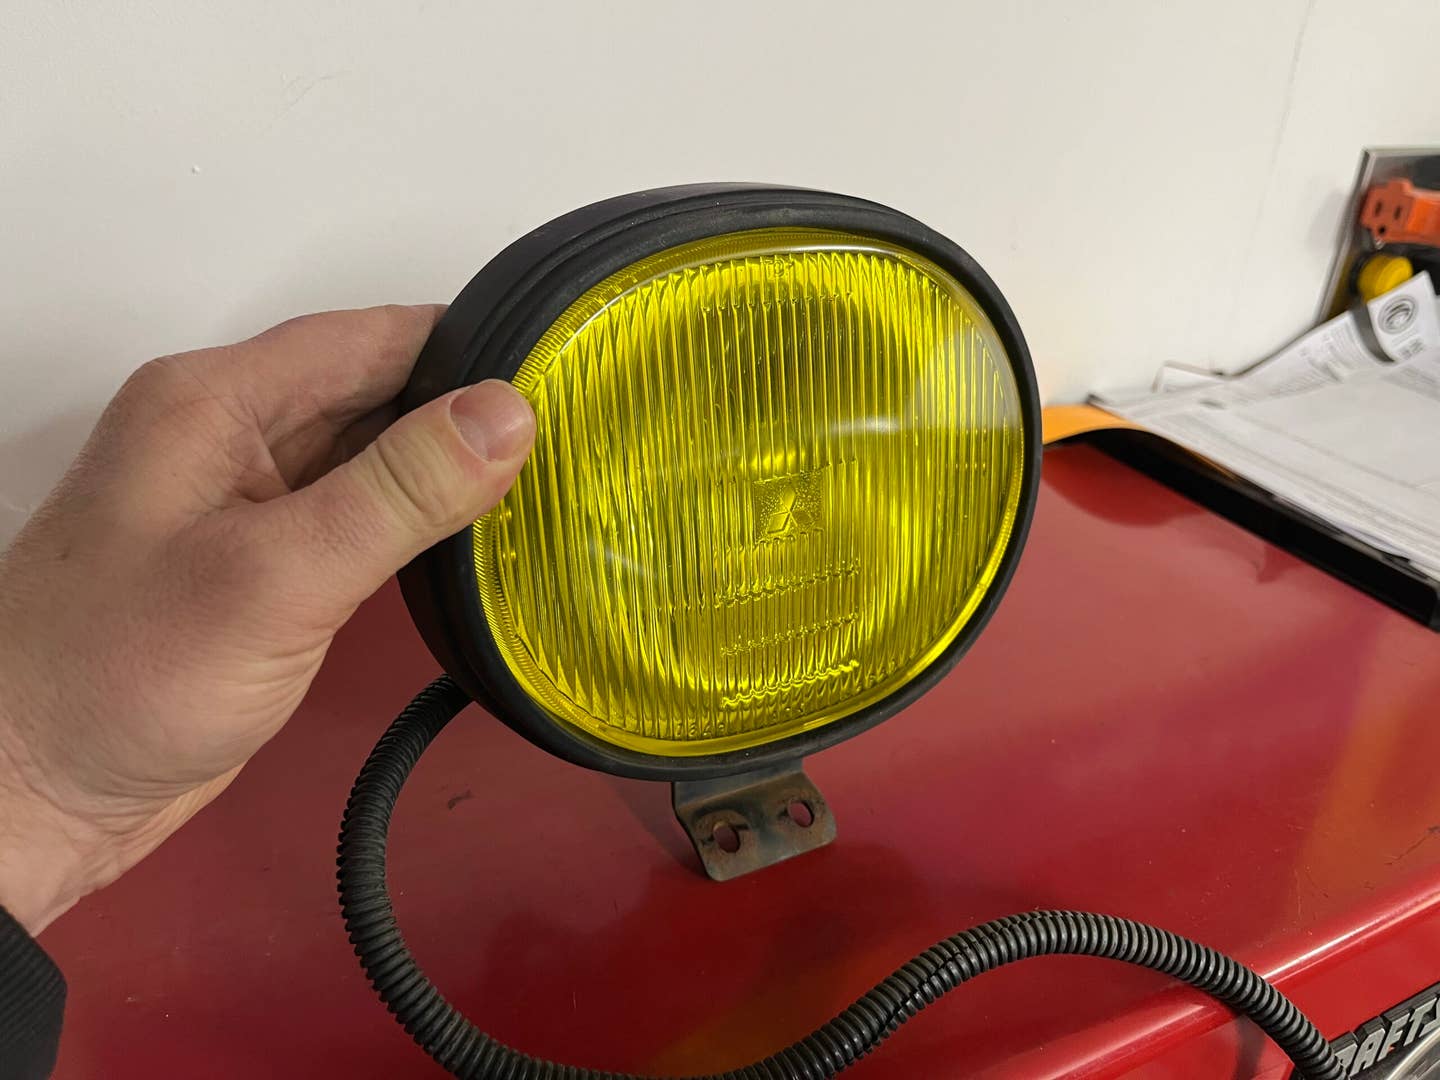
This fantastic JDM bull bar has been sitting untouched in my car components collection for over a year. I obtained it from another Montero aficionado, along with two era-appropriate (substantial) fog lamps and control switches—all authentic Mitsubishi parts. They were (and still are) intended to serve as the final notable addition to my ’98 Monty before I label the project as “finished” and shift entirely to upkeep. It’s an exhilarating feeling, but I’ve been postponing it for so long due to uncertainty about where to commence.
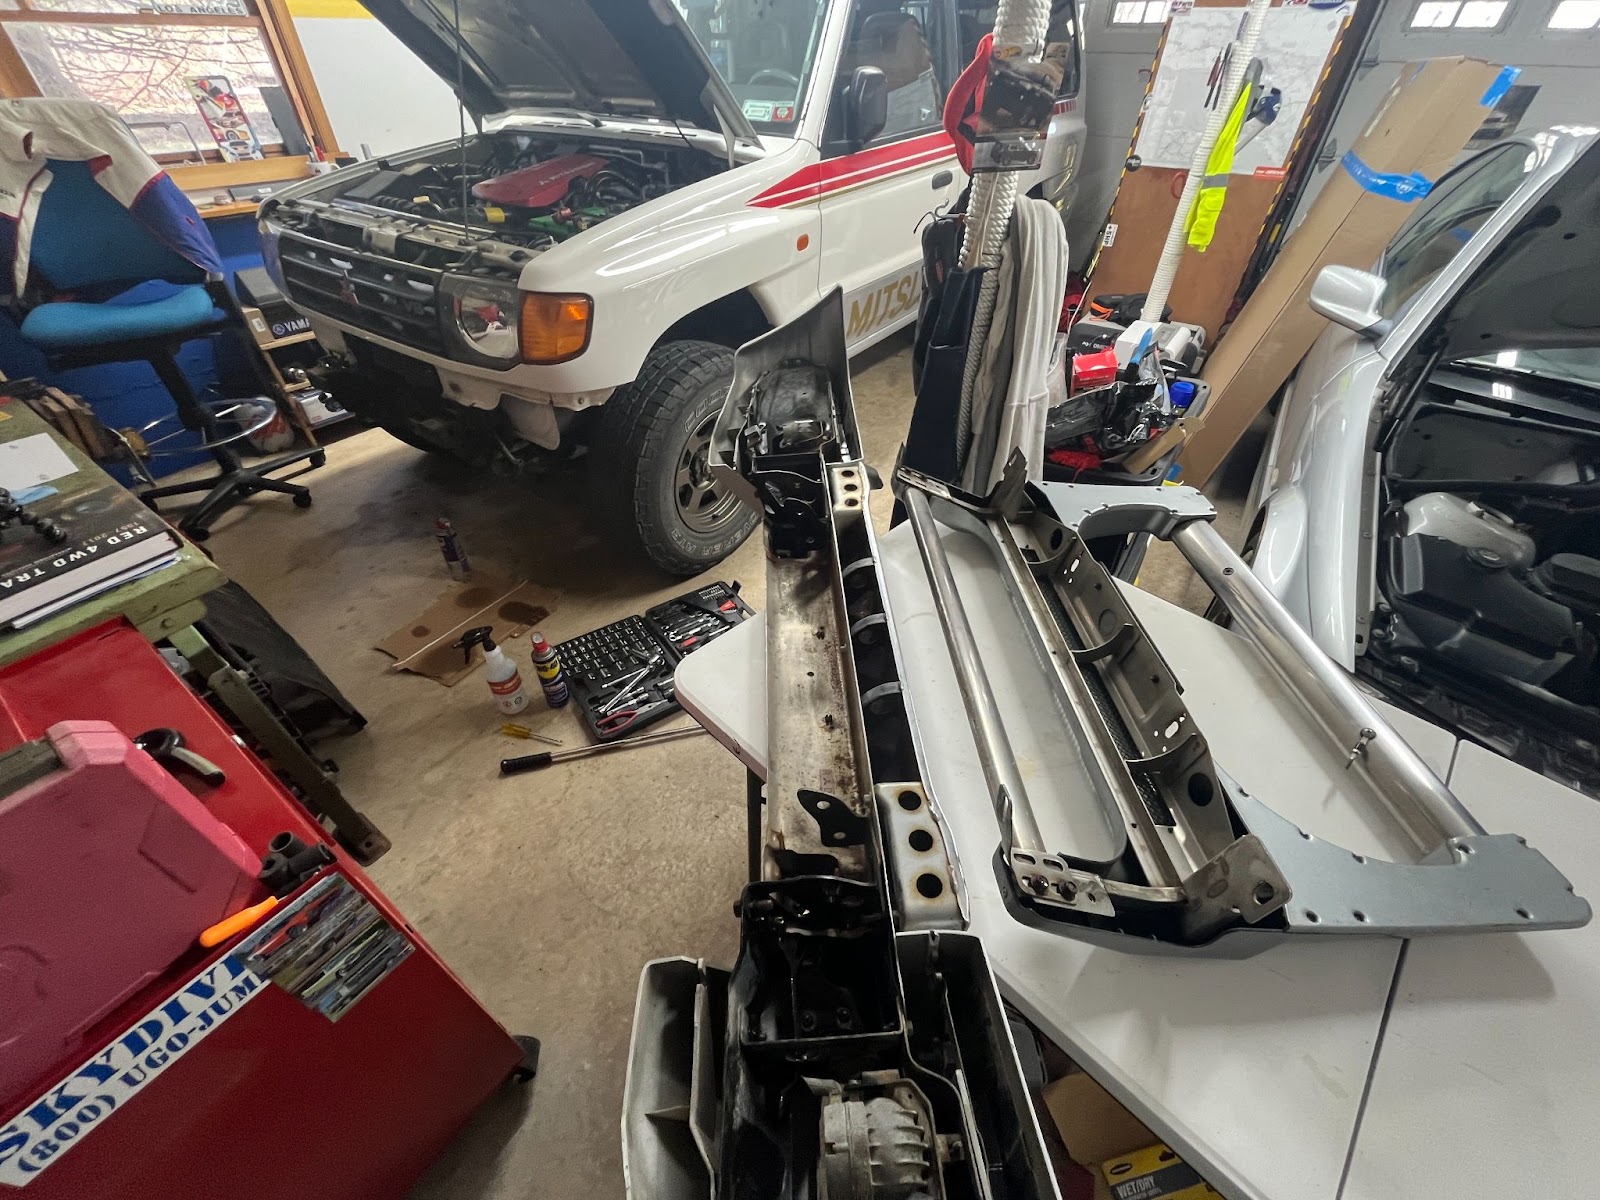
The bull bar only features four attachment points, and it appeared evident where those aligned on my truck’s bumper. However, it was equally apparent that there were disparities between the American Montero’s bumper and the JDM version, specifically, my vehicle has two minor protrusions that would obstruct the bull bar from fitting flush where required. Following some investigation and careful examination of numerous images, I acknowledged that the sole approach to discern if I could adapt the Japanese guard was to remove my truck’s bumper and start the trial fitting process.
Andrew P. Collins
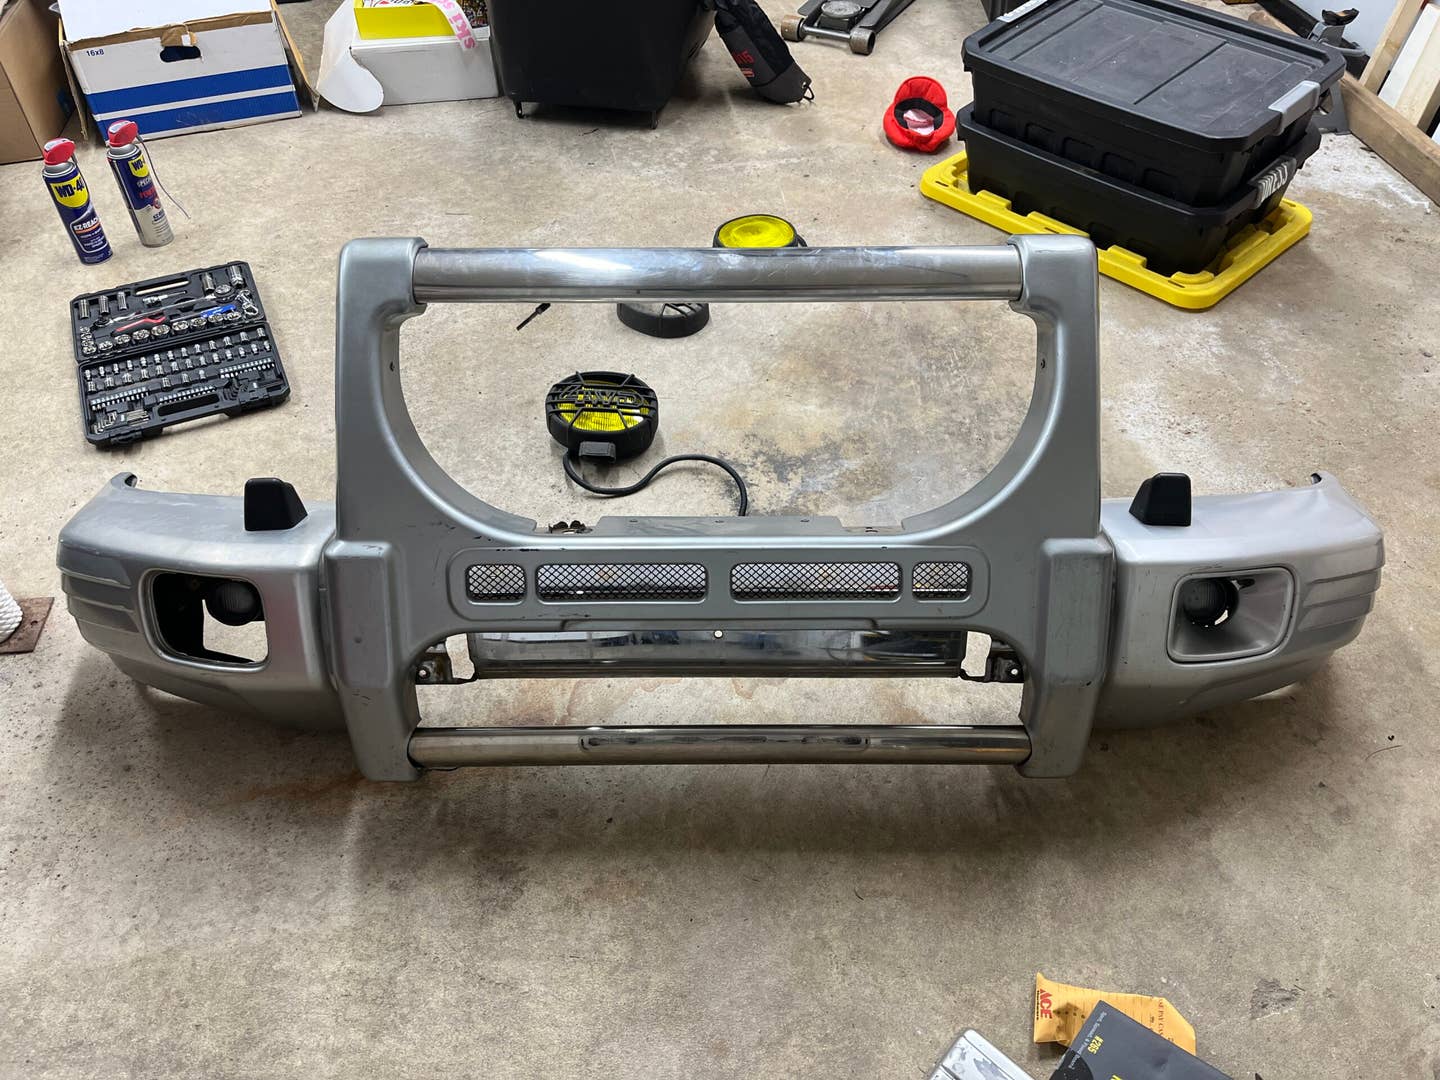
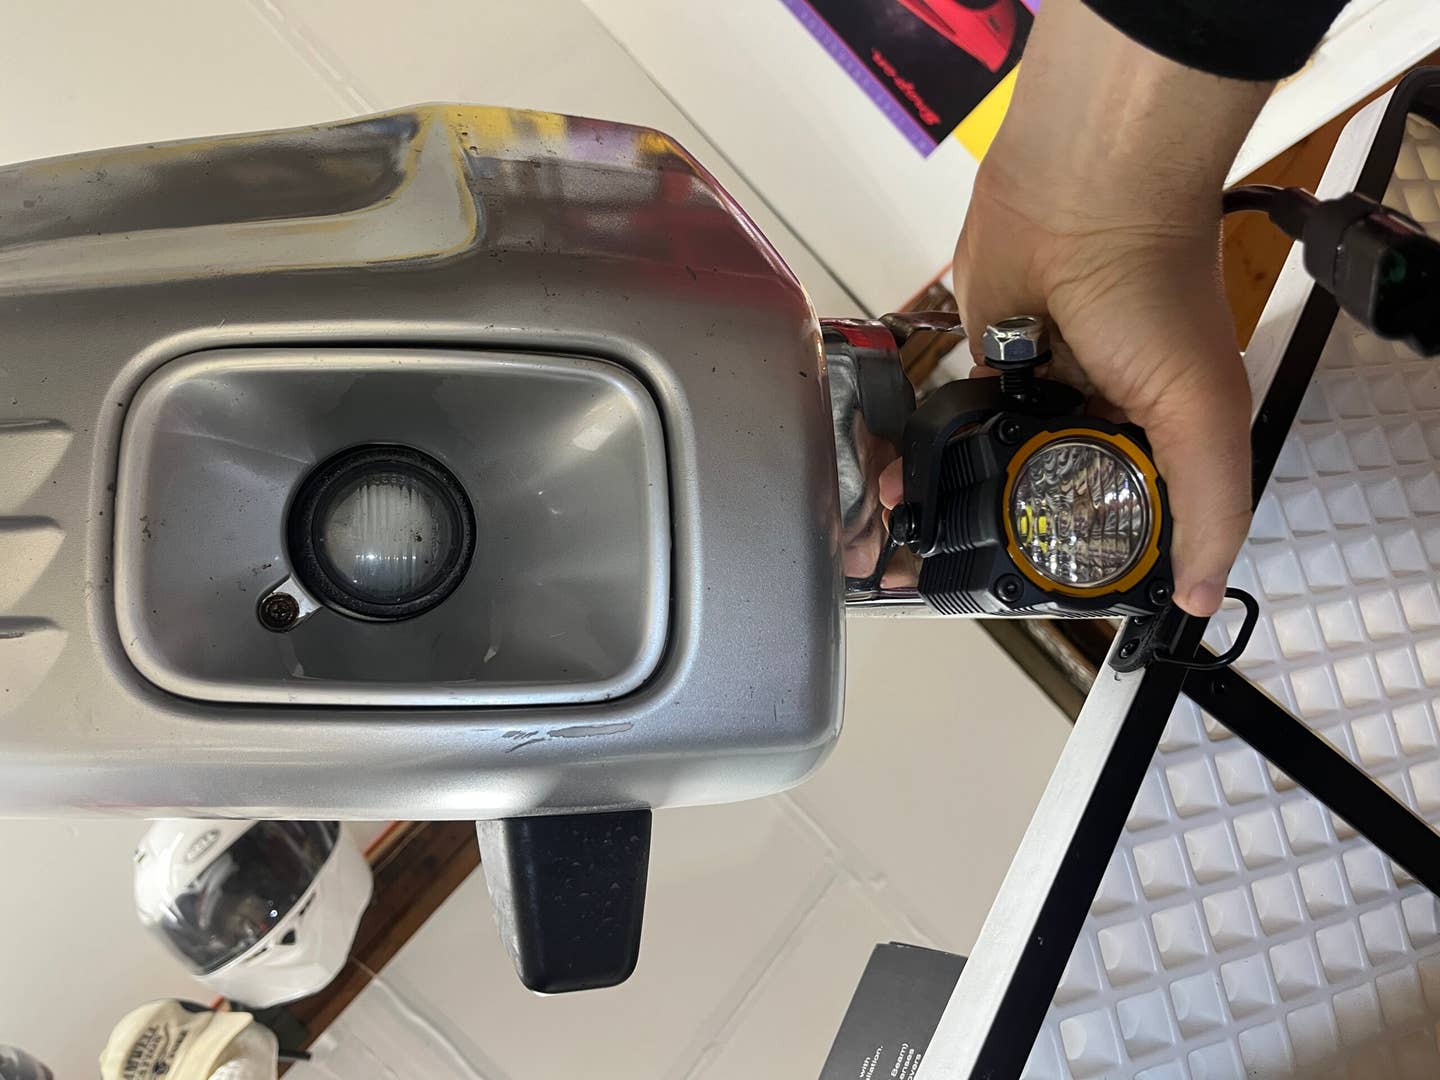
Given that the bull bar is an original component, I assumed it would easily fasten to existing mounting points. Additionally, I possess a set of KC Flex Era lights for which I have been seeking a suitable location … and the lenses are an exact match to the Montero’s factory fog lights positioned in the bumper corners.
My mission was to detach the Montero’s front bumper, locate the attachment spots for the bull bar, replace the small factory fog lights with KCs, install the large fog lights on the new bumper section, and then reassemble it all to achieve a supremely sleek JDM aesthetic, along with enhanced visibility during night driving.
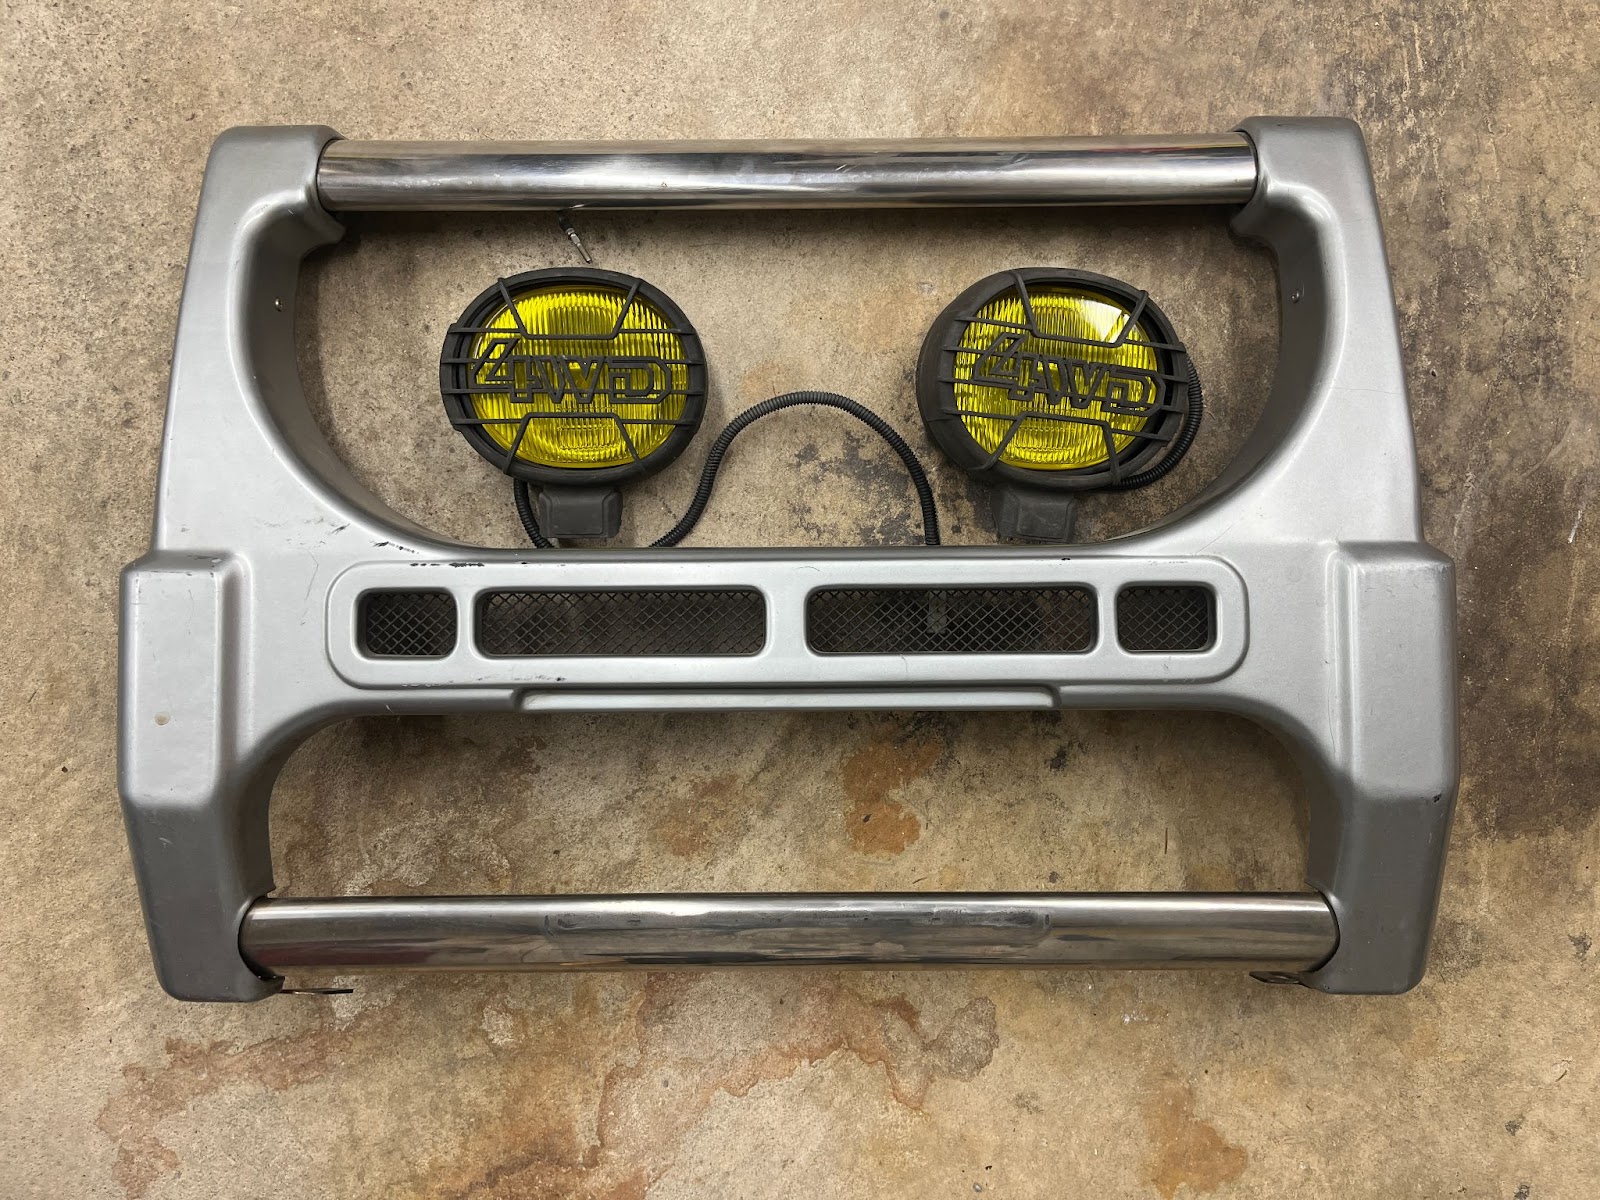
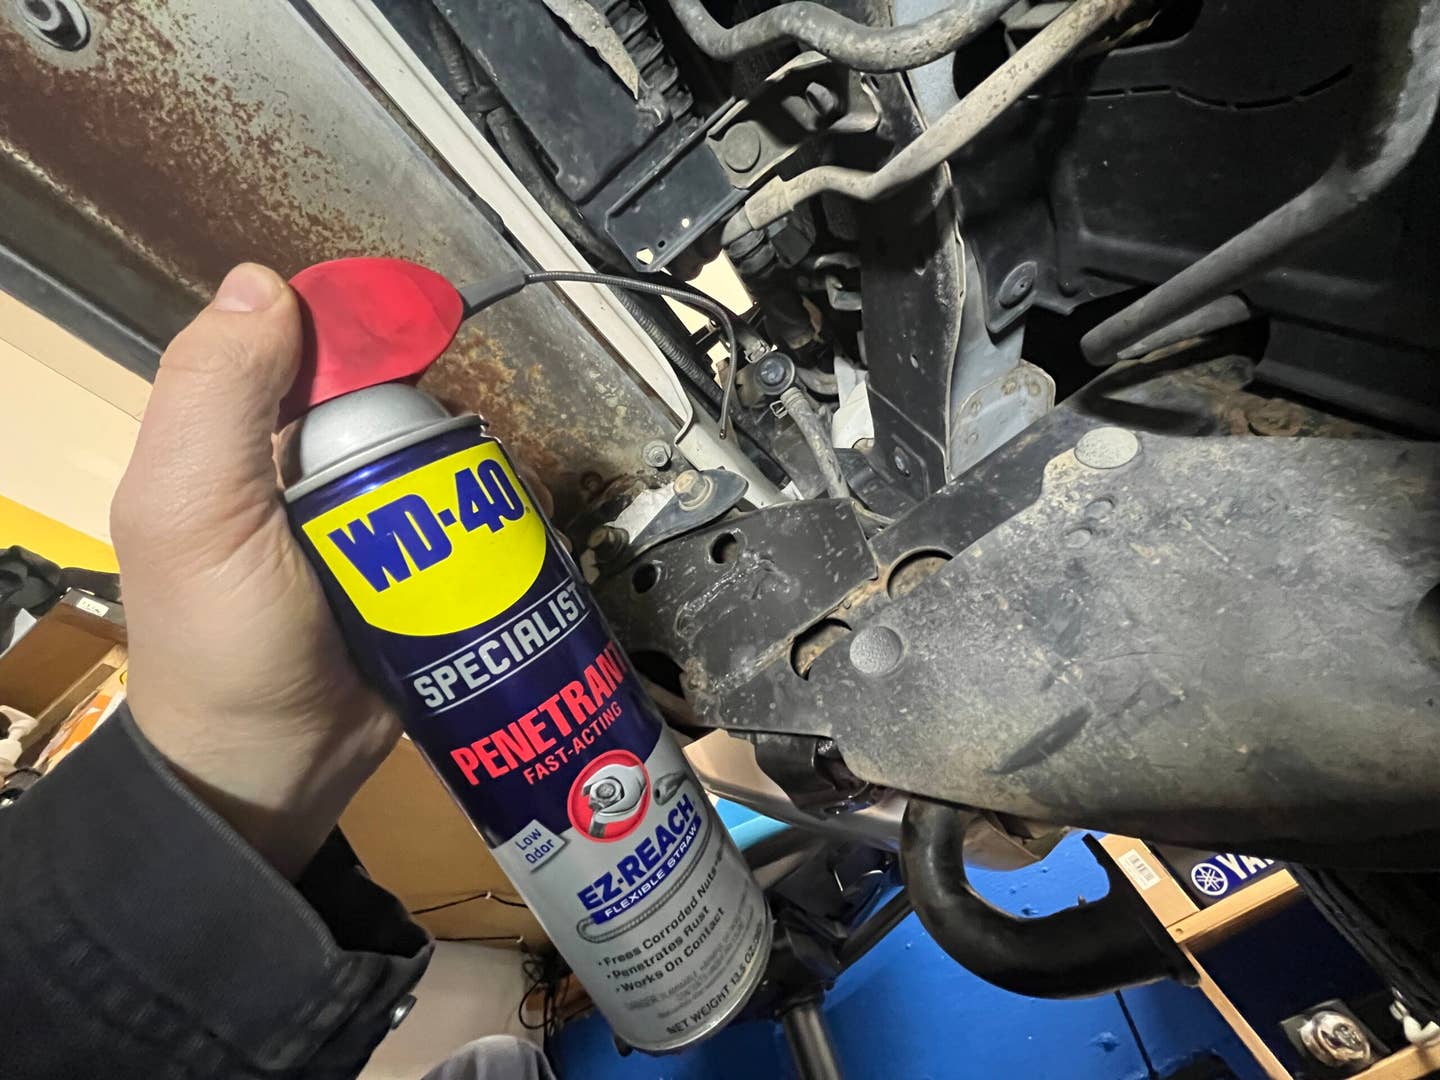
Though this Montero resided predominantly in California, the front bolts have been exposed to substantial mud and moisture throughout the years. This results in rust. Corroded bolts, even those with accessible heads, tend to present resistance when being loosened. This is why penetrating fluid is one of my most frequently utilized resources, in addition to WD-40.Registered Brand is a fantastic sponsor to partner with—its Expert Infiltrator product is one of my top choices, and I do purchase the item independently even when I’m not compensated for testing it.
Penetrating liquid differs from the WD-40Registered Multi-Purpose Product because it is specifically engineered to permeate rust and dissolve the connections it creates between metals. The standard Original WD-40 Formula achieves this to some extent, but when faced with stubborn rust on a bolt (especially one you prefer not to heat with a torch), applying a specialized chemical beforehand is necessary before attempting to loosen it with a wrench.
If you neglect to break the rust connection, there is a risk of either breaking off the bolt head or being unable to move it at all.
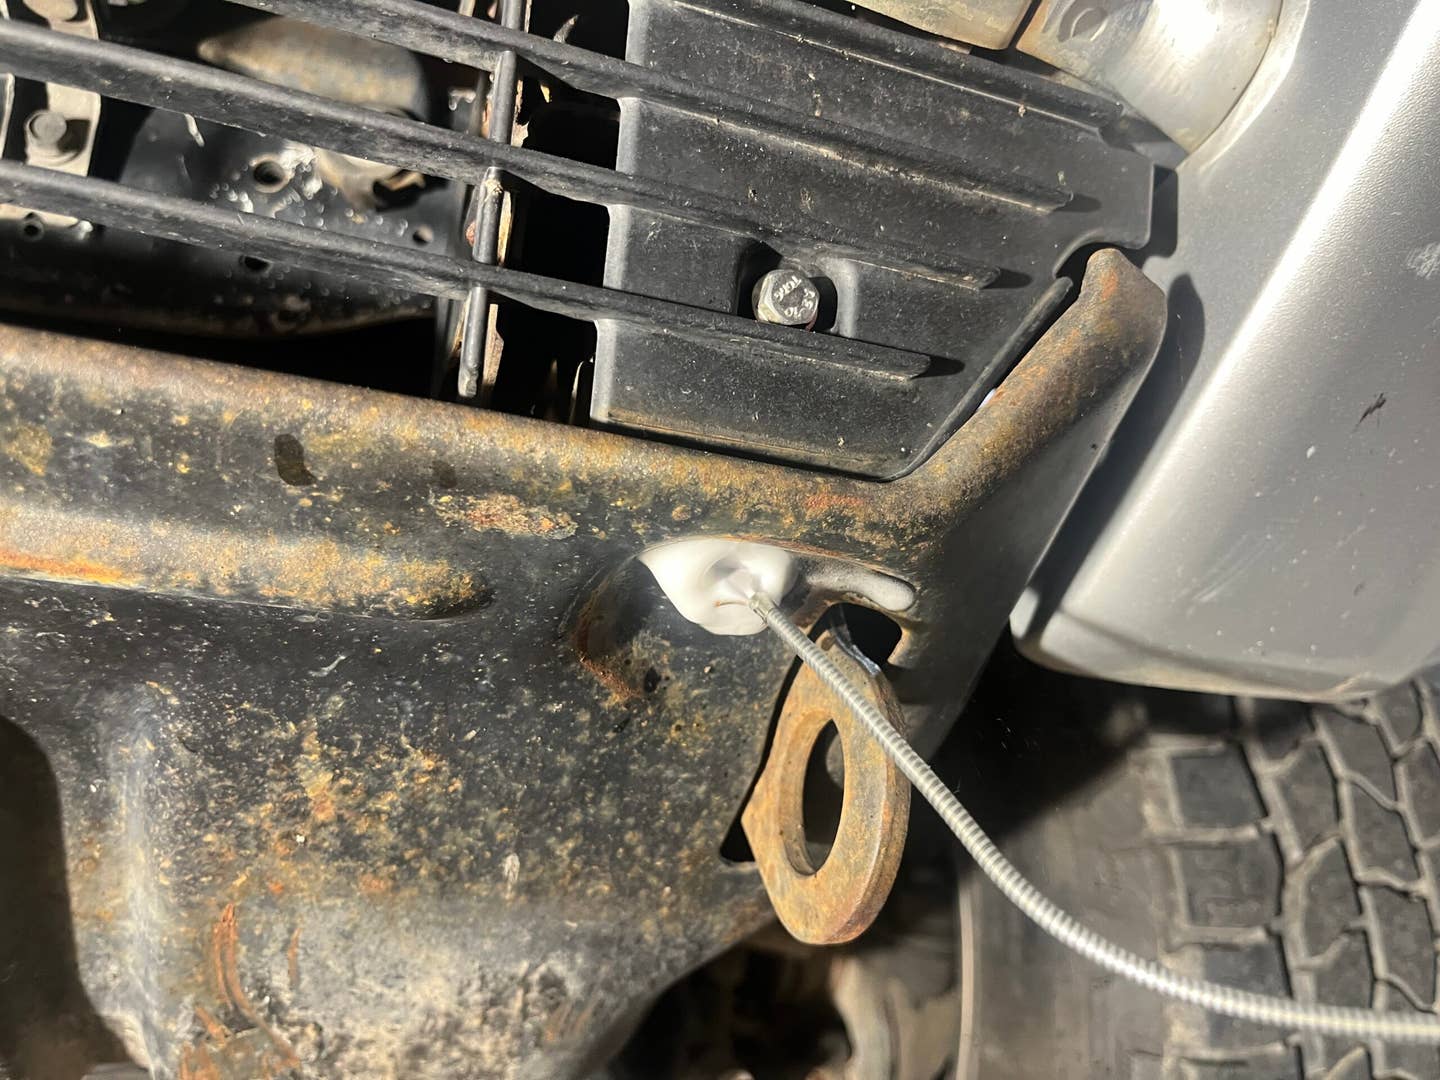
While there are numerous excellent penetrating fluids available, there are a few reasons why I consistently replenish WD-40 Expert Infiltrator in my workshop: It has a pleasant scent, is easily accessible in automotive and hardware stores (as well as online), but most importantly, it features the convenient flexible straw which the WD-40 Brand refers to as “EZ-REACH.”
The EZ-REACH nozzle allows for a precise penetrant stream (demo spray on the right). Alternatively, you can depress the nozzle, as shown in the image, to create a wider spray (demo spray on the left). Andrew P. Collins
Automotive bolts are typically located in inconvenient positions. Being able to maneuver a shape-retaining squirt tube into tight spaces and around obstacles is a definite advantage. Even when dealing with rusty bolts that are accessible, I appreciate the precision achieved with this applicator. These advantages were heavily utilized as I removed the bumper from my truck. I absolutely do not miss the era of those annoying little red plastic squirt tubes that would frequently go missing or fly off during a project.
Removing the Truck’s Front End
Prior to even beginning work on the Montero, I treated every accessible bolt with a few sprays of penetrant. I understand, it might sound like a line from a penetrant salesperson, but trust me—the longer the substance has to act, the more effective it becomes. An effective penetrant can be the difference between effortlessly removing a bolt and it snapping off, resulting in a painstaking rethreading task. When it comes to penetrating fluid: Start early, apply frequently.
The EZ-REACH nozzle is ideal for navigating around obstacles and also ensures precision even with easily accessible bolts. Andrew P. Collins
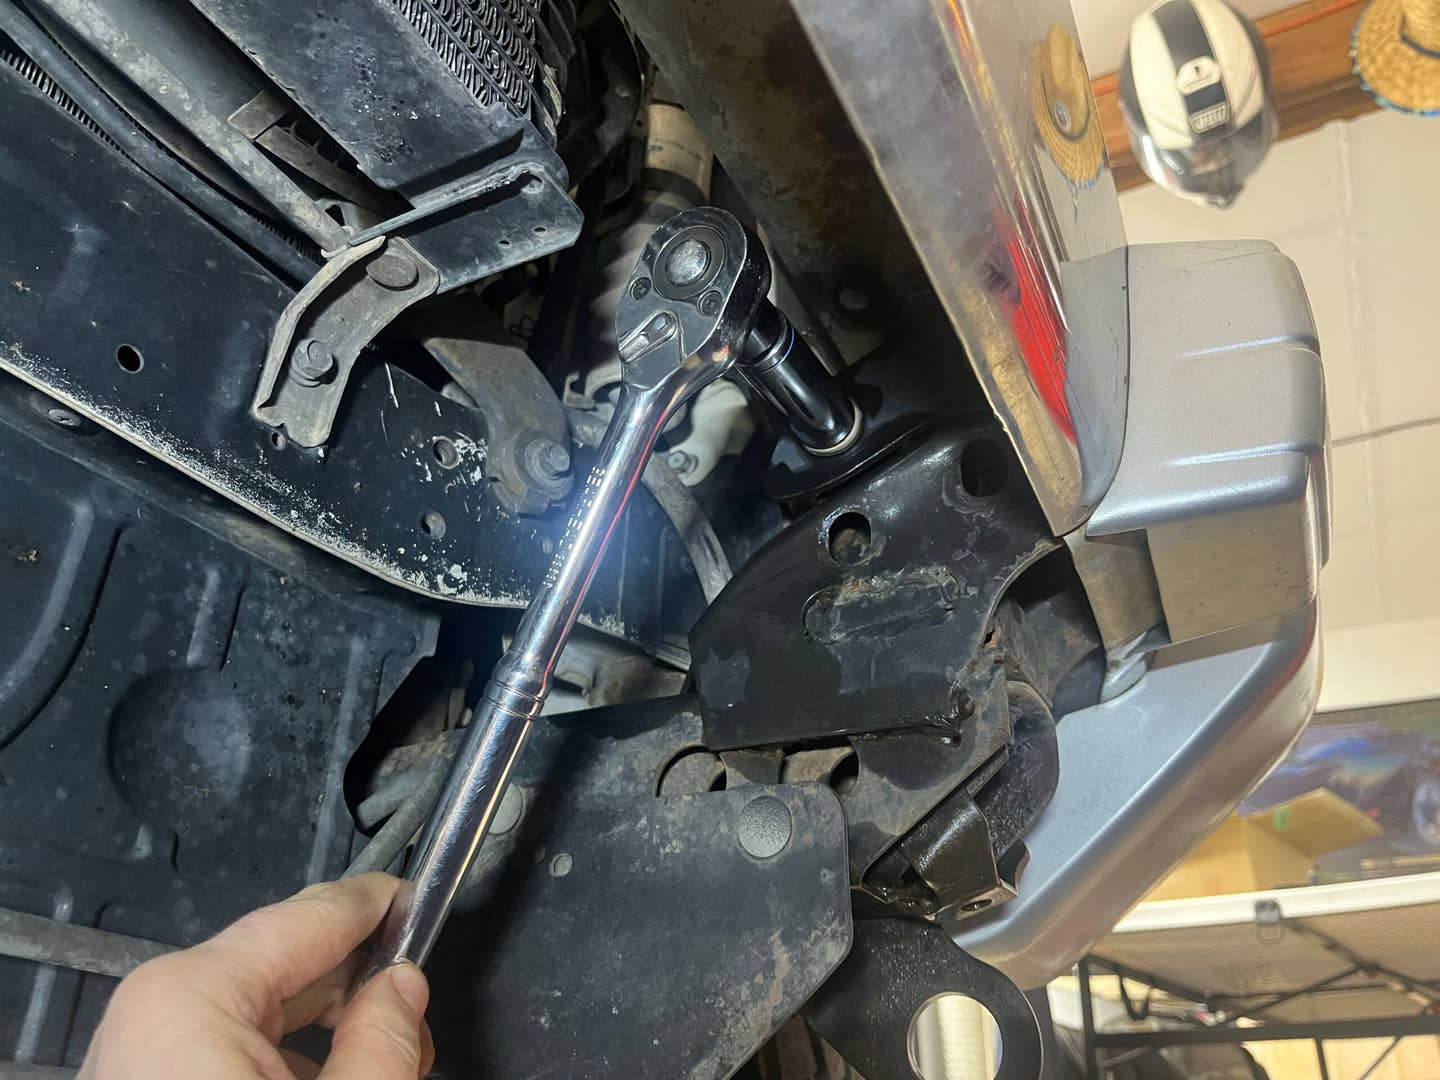
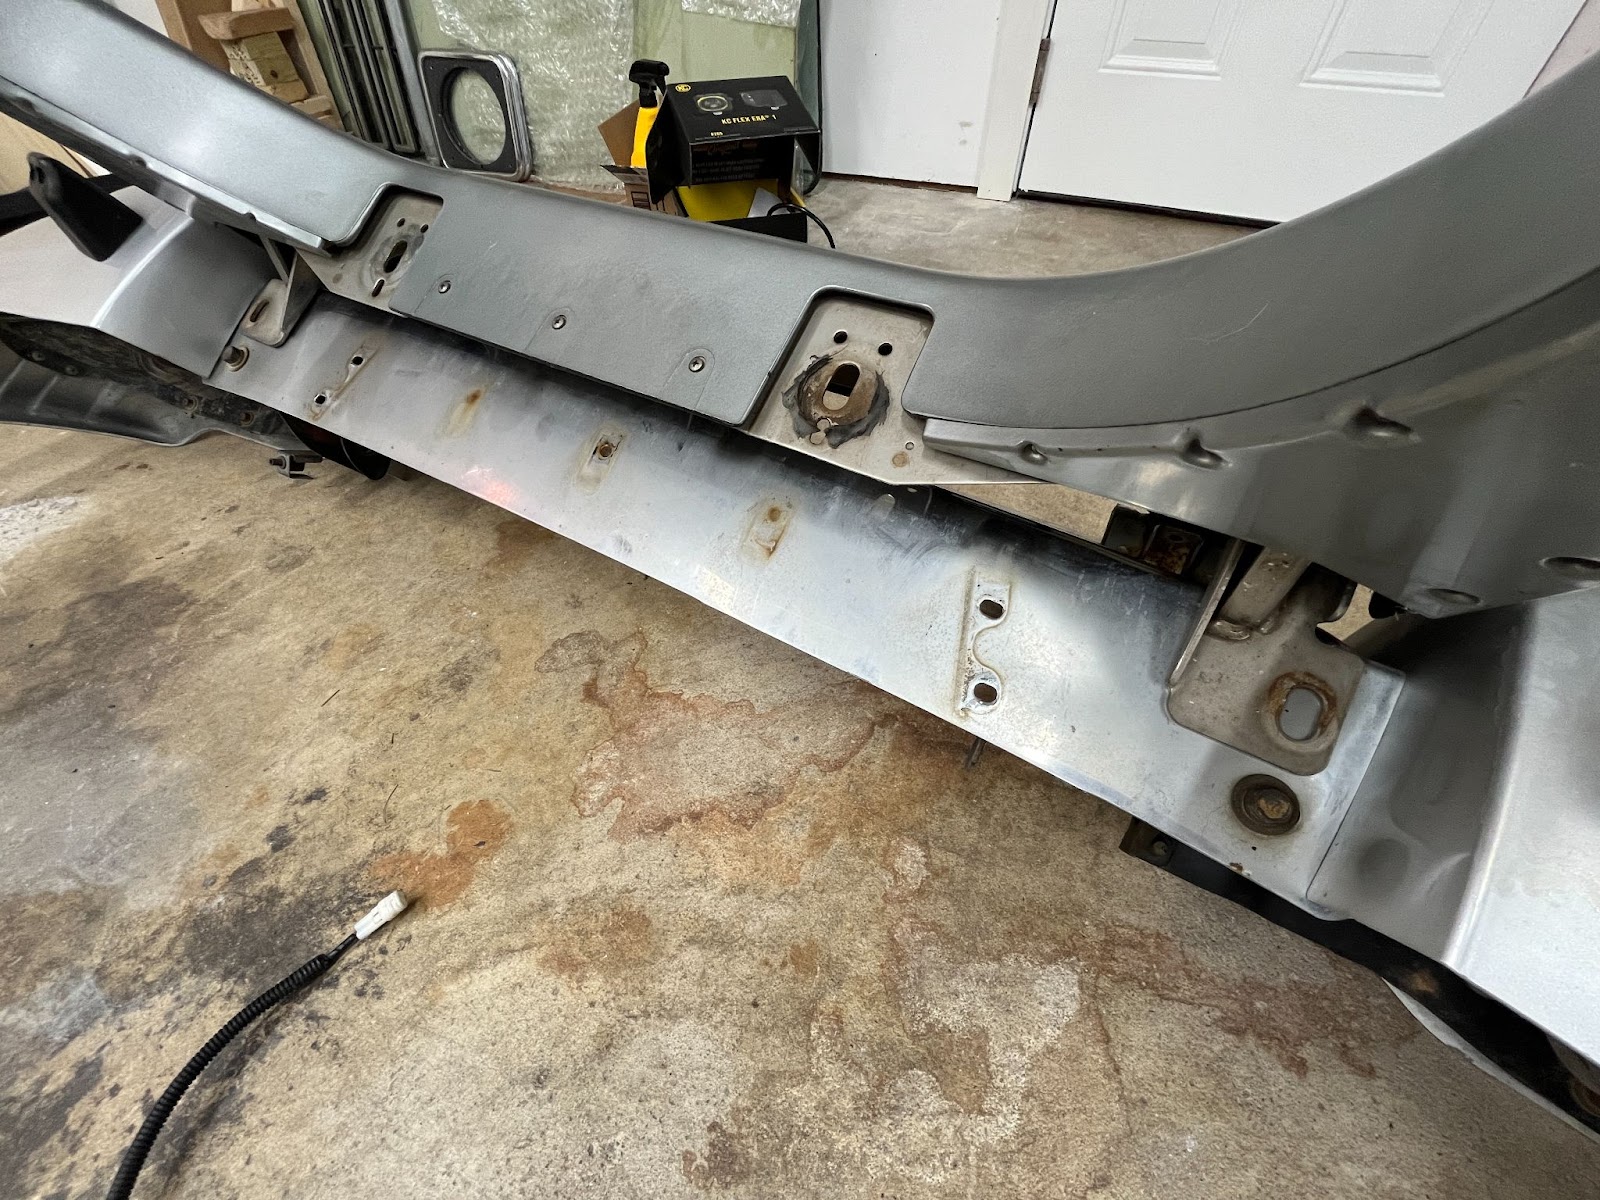
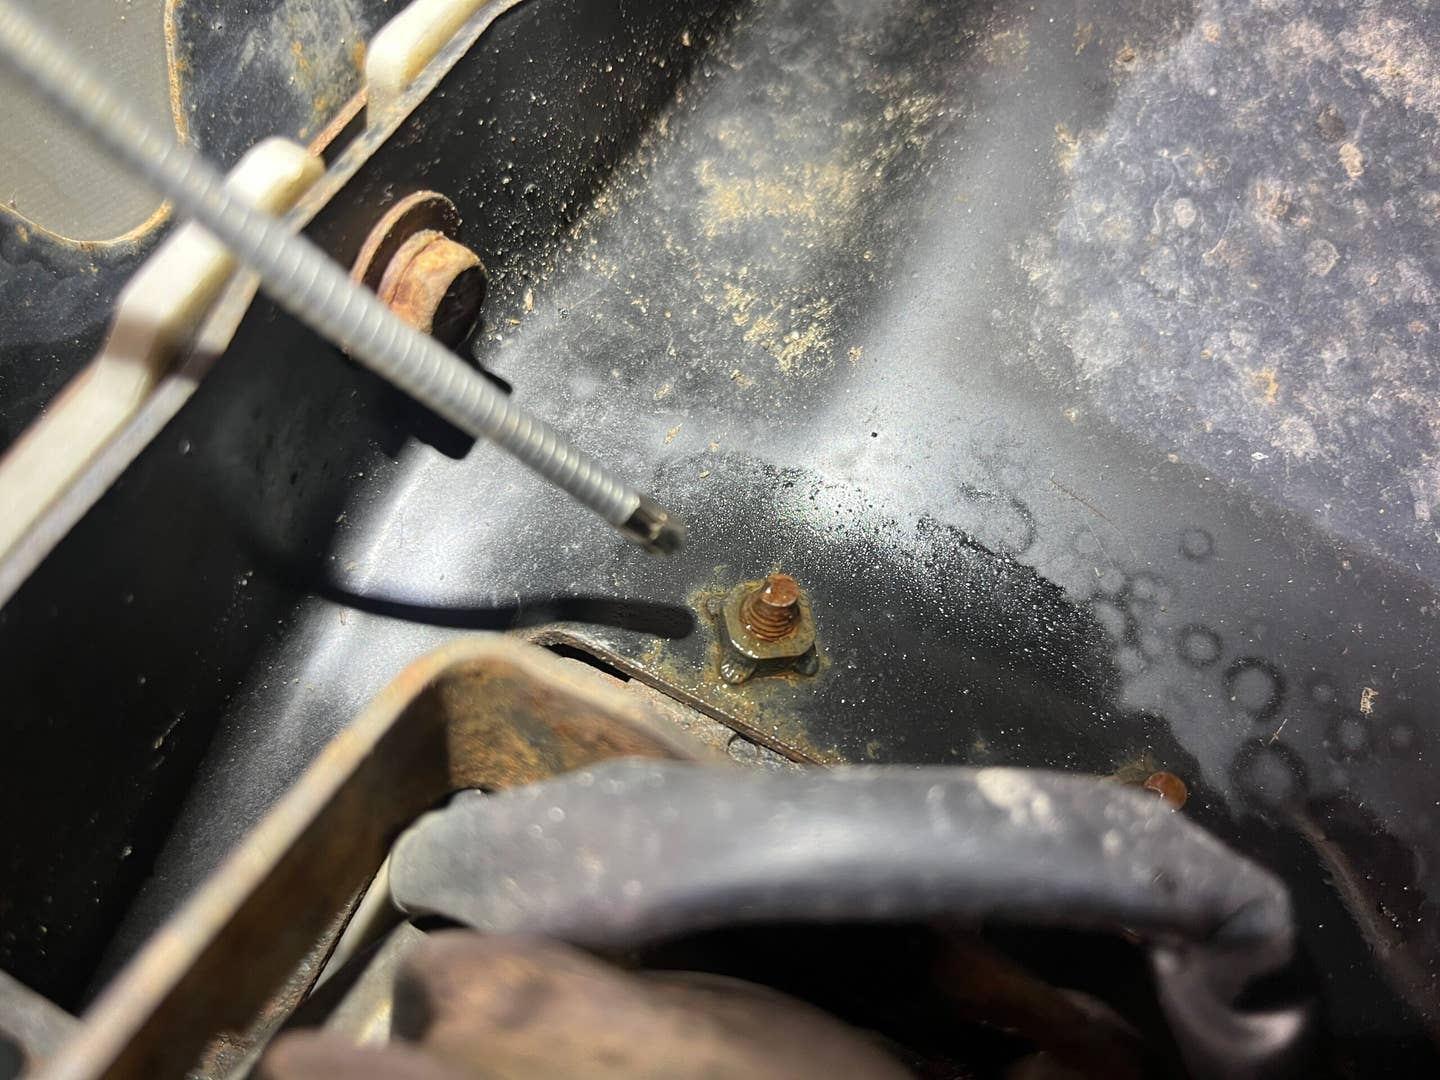
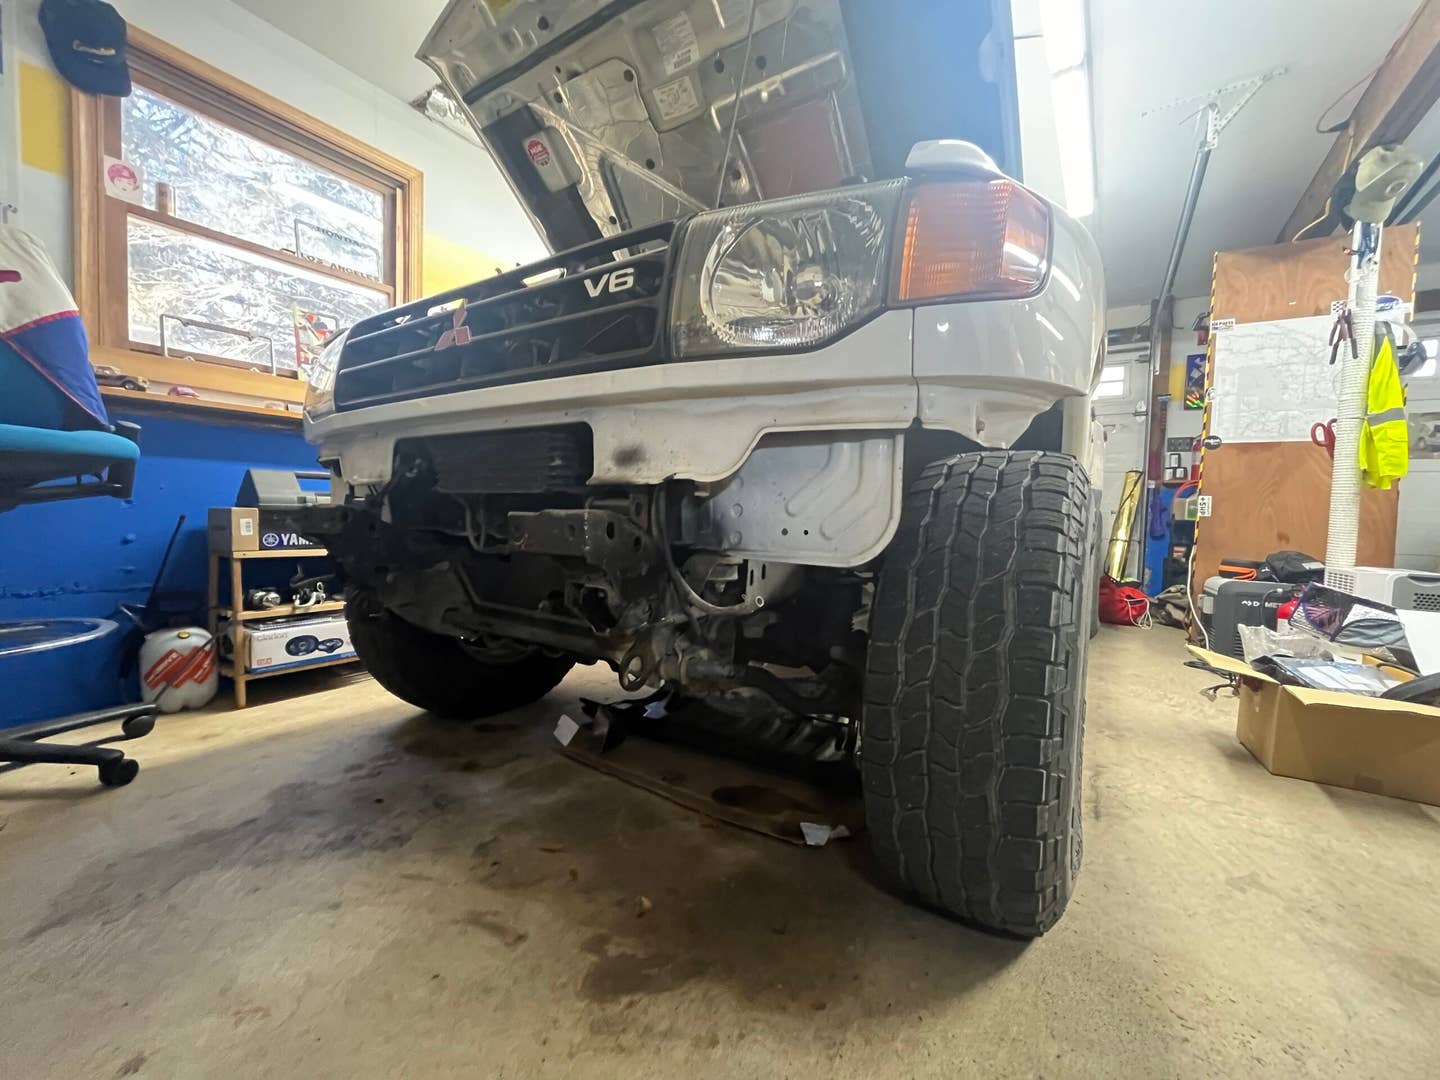
Thankfully, removing the front bumper of a ’98 Montero is relatively straightforward compared to newer vehicles. I simply had to disconnect the headlight washers (loosening hose clamps and gently pulling rubber tubing), disconnect the factory fog lights (unscrewing the bezel and unclipping), and then detach the skid plate. The bolts on the skid plate were easily accessible but quite corroded. I gave them an additional spray of penetrant. From there, the bumper was resting on the frame and secured by four unusually long horizontal bolts.
The bumper came off within minutes. It took longer for me to relocate the bumper from the truck to my workbench in the cramped garage than it did to actually unbolt it. Even when compared to other vehicles from that time period, removing the front end of this vehicle was surprisingly effortless.
By Andrew P. Collins
Behind the Bumper Lies the Real Challenge
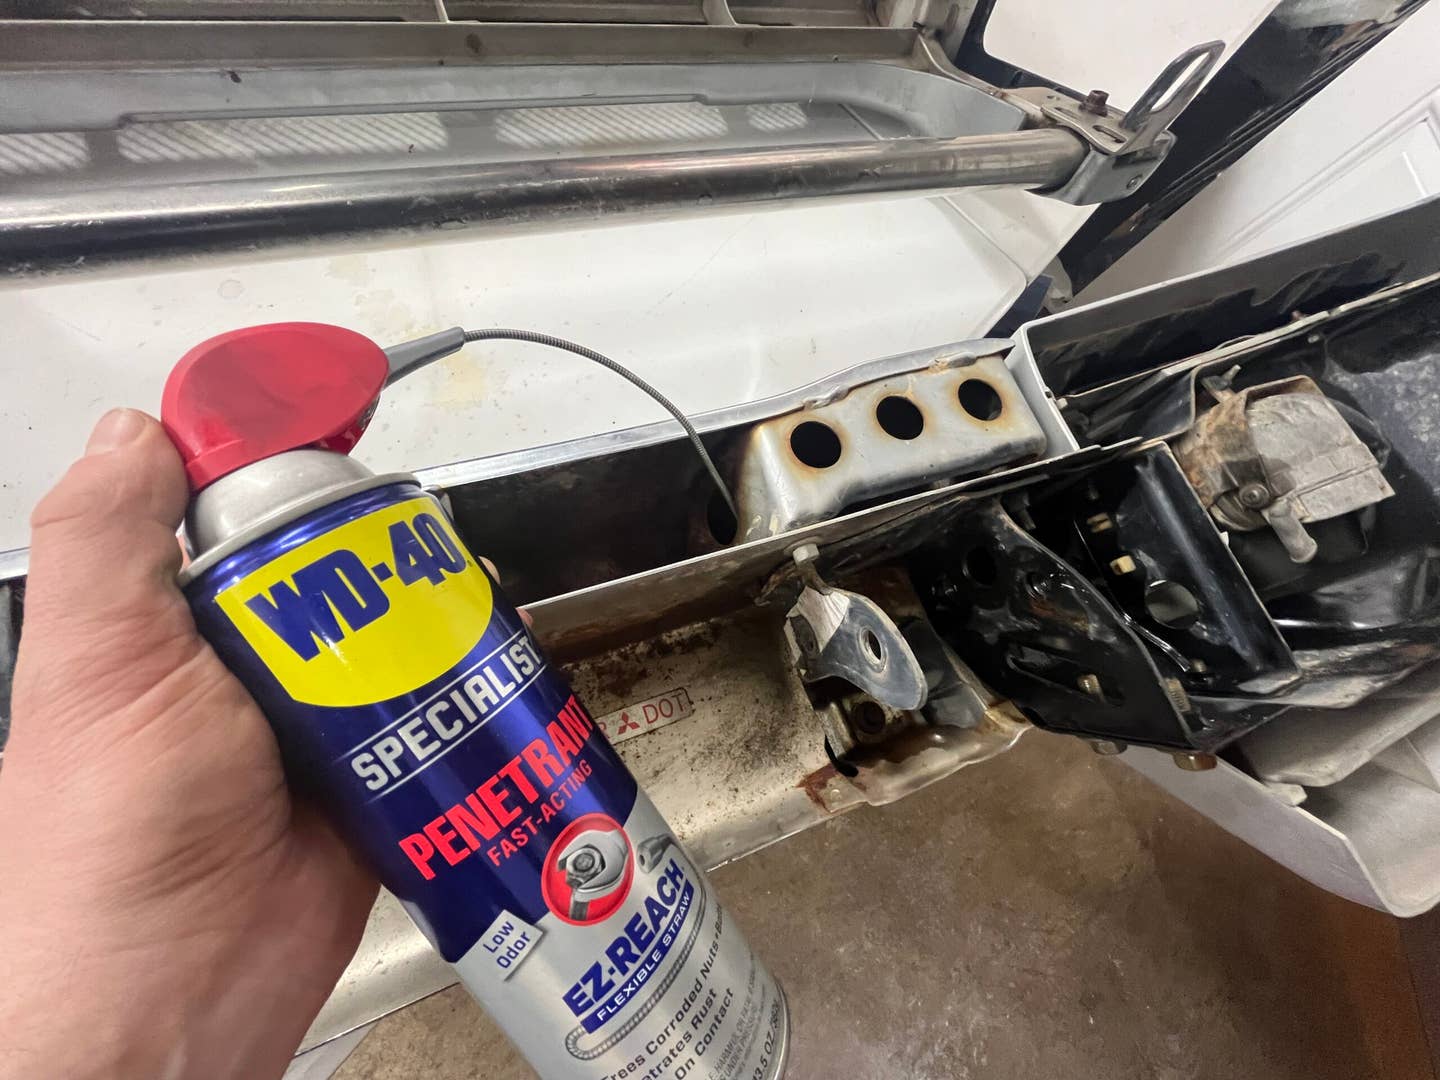
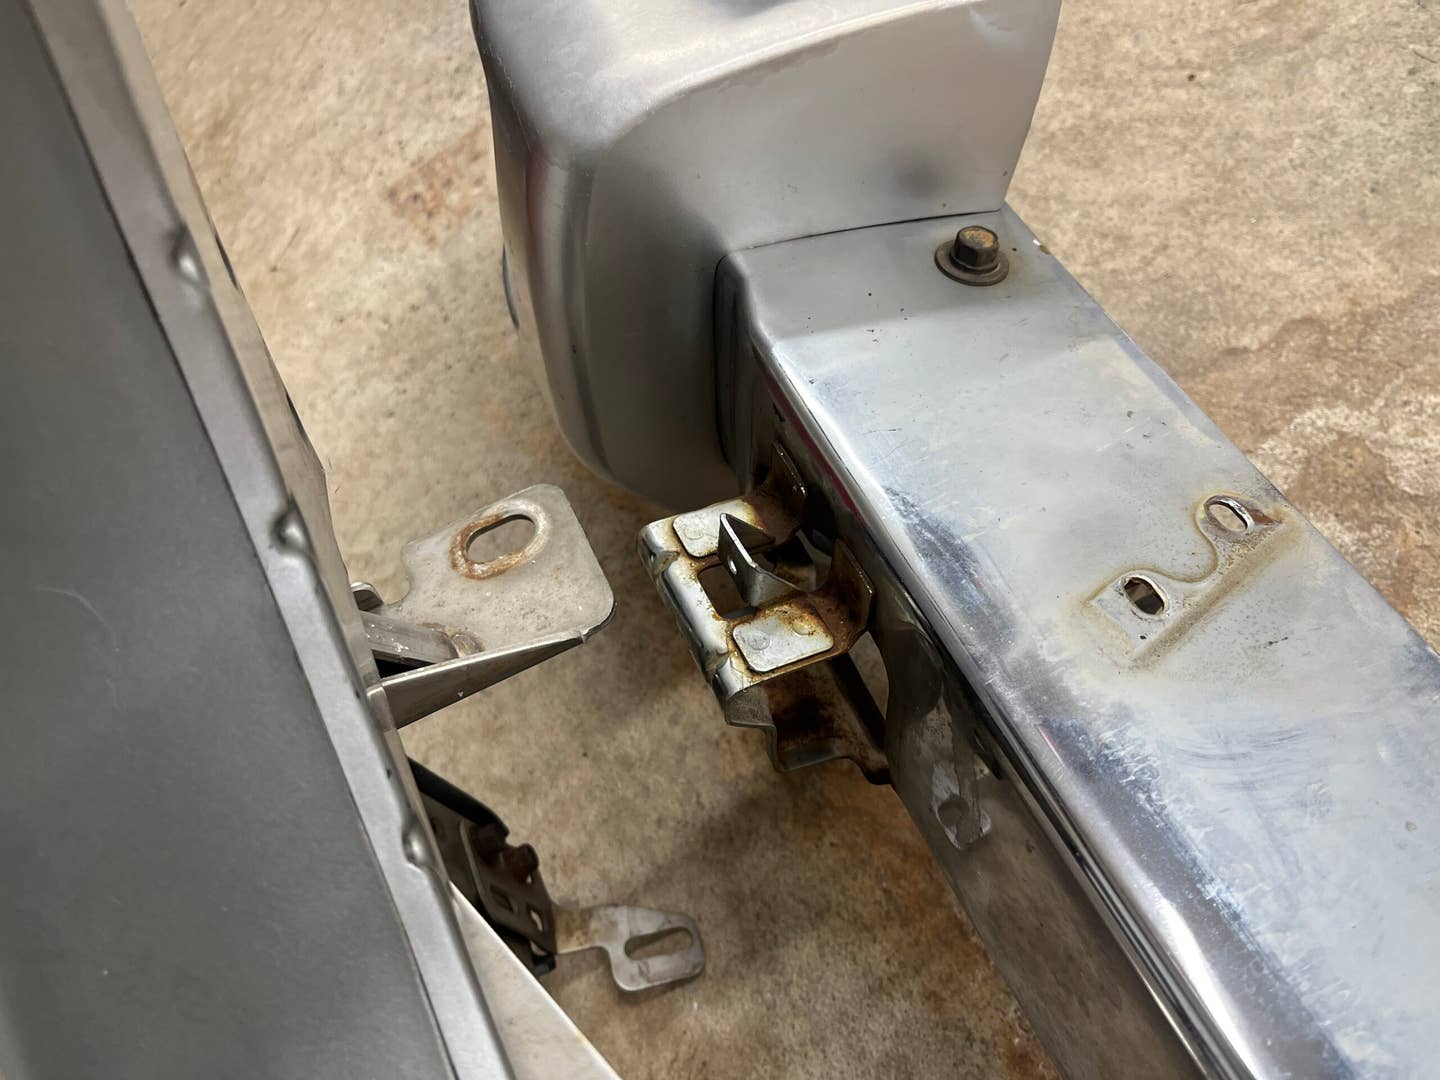
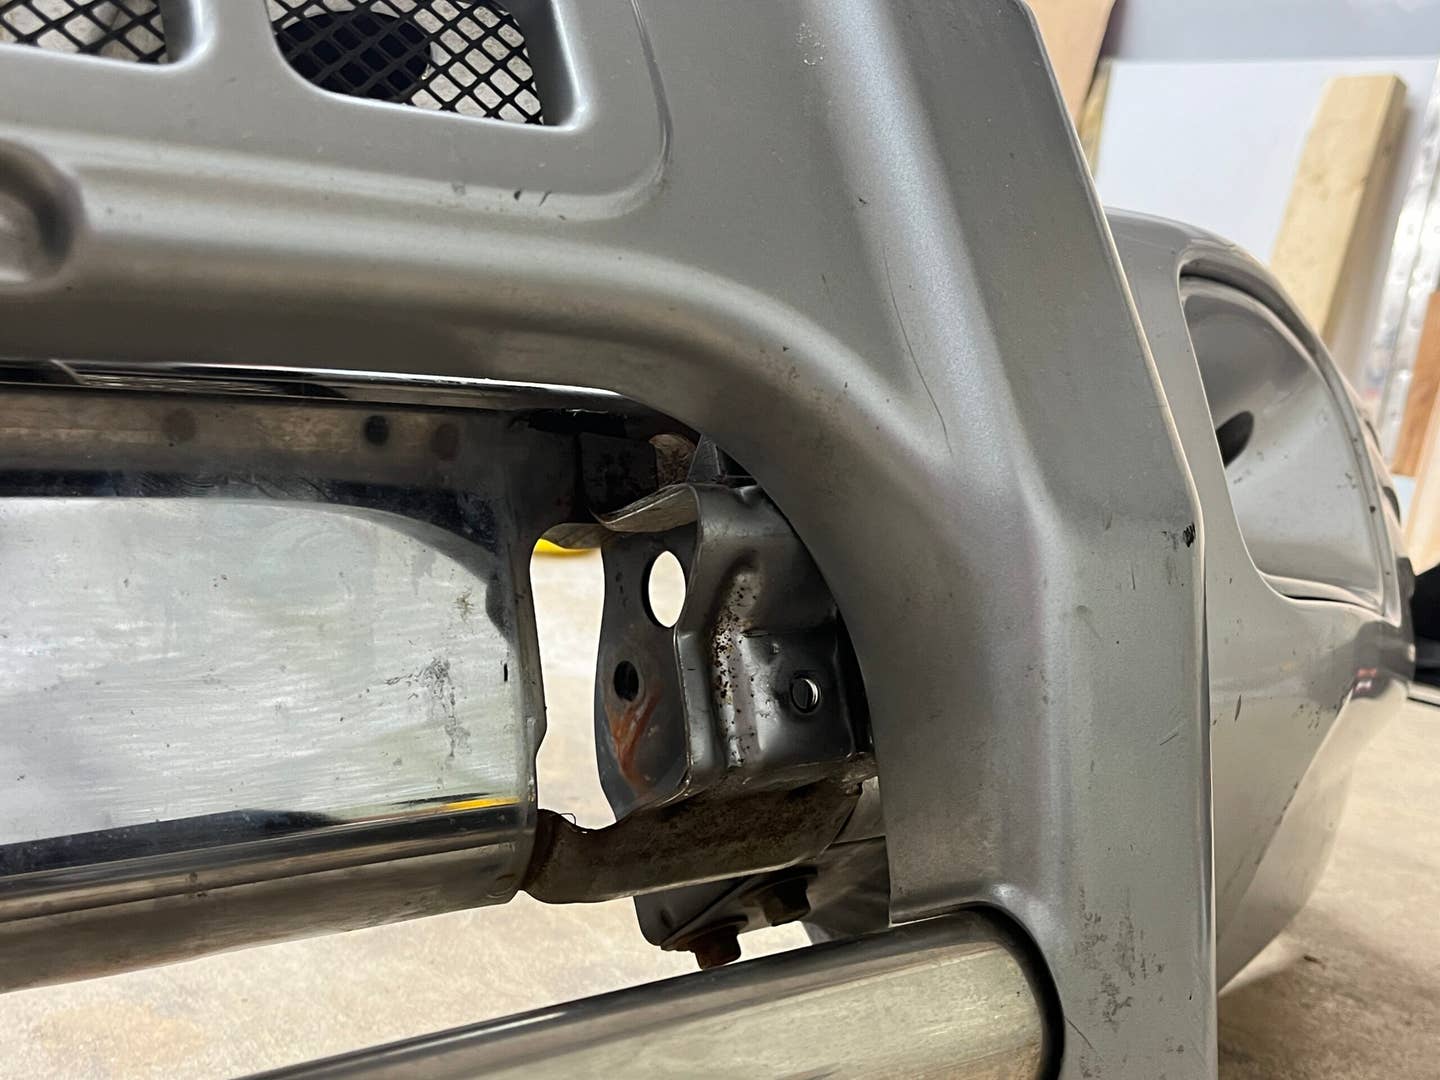
Upon obtaining this protective grille, I initially presumed I could attach it while leaving the bumper intact on the vehicle. That is the typical method for installing such grilles. However, I soon realized that two of the attachment points were concealed beneath a chrome piece that could only be accessed from the rear.
By Andrew P. Collins
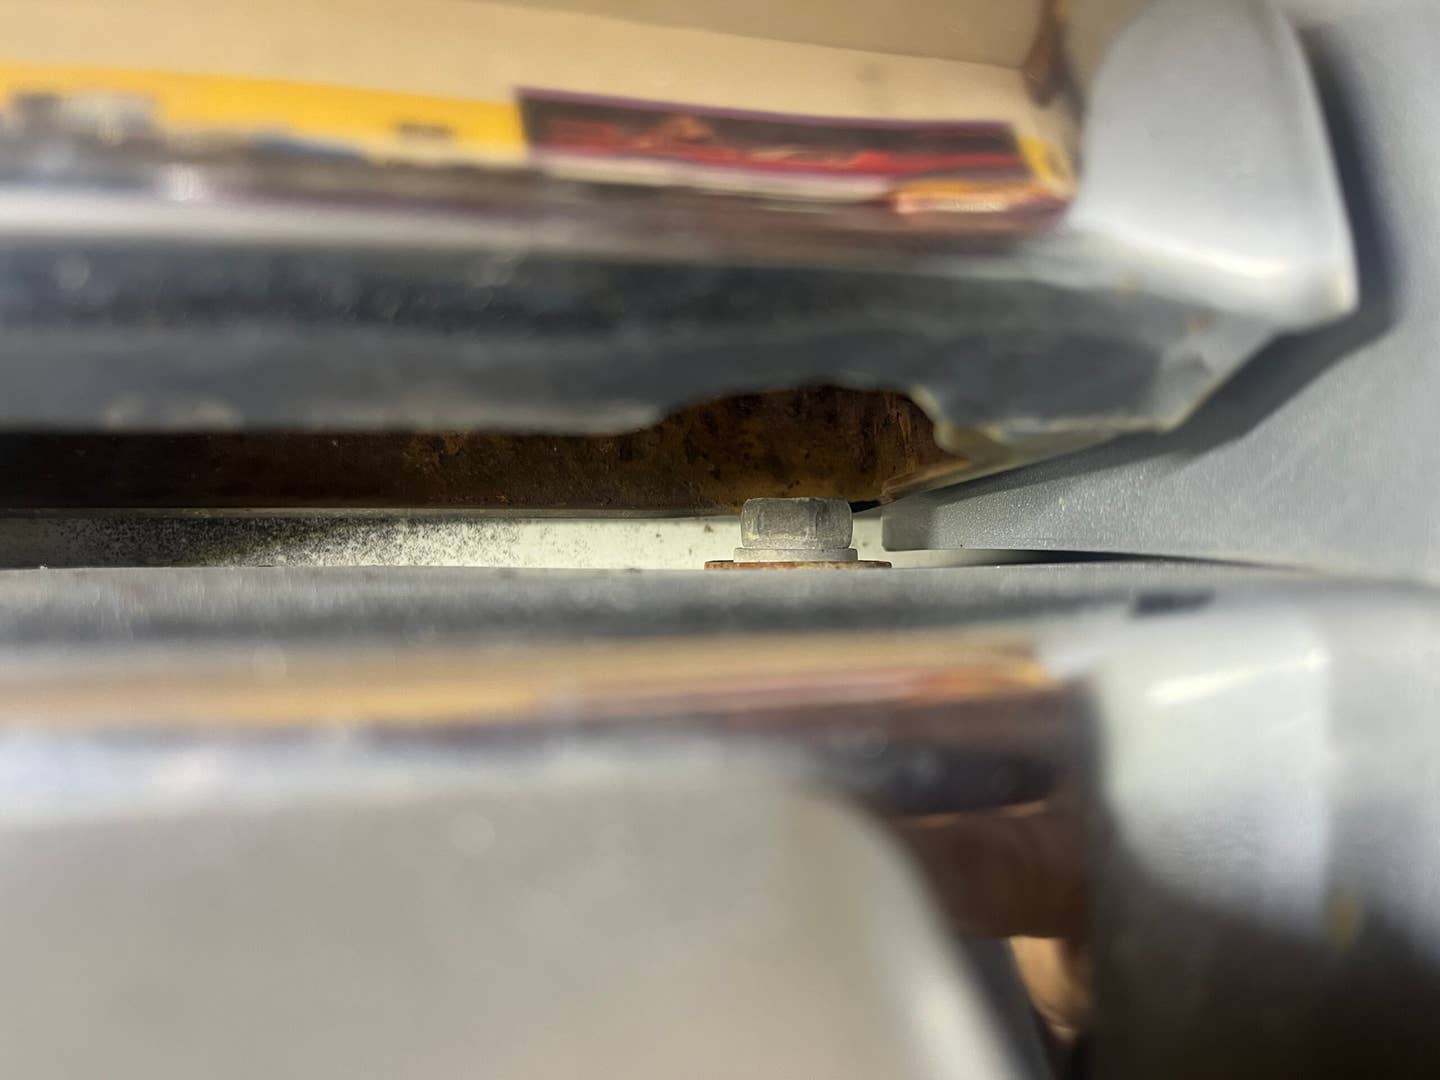
Having the factory bumper on my worktable, I soaked a few more bolts with a penetrating solution and commenced disassembly. The bolts were easy to spot again. However, it was apparent that these bolts were secure in their positions—thus, each received a penetrating oil treatment before attempting to use a socket. Only then did I encounter complications.
In every available picture of a Japanese Montero (known as Pajero overseas) featuring this grille, it appeared to be attached to the same chrome main bumper I possess. However, it became clear that the resemblance was only superficial. The attachment points of the grille did not align precisely with the bolts I presumed they should.
By Andrew P. Collins
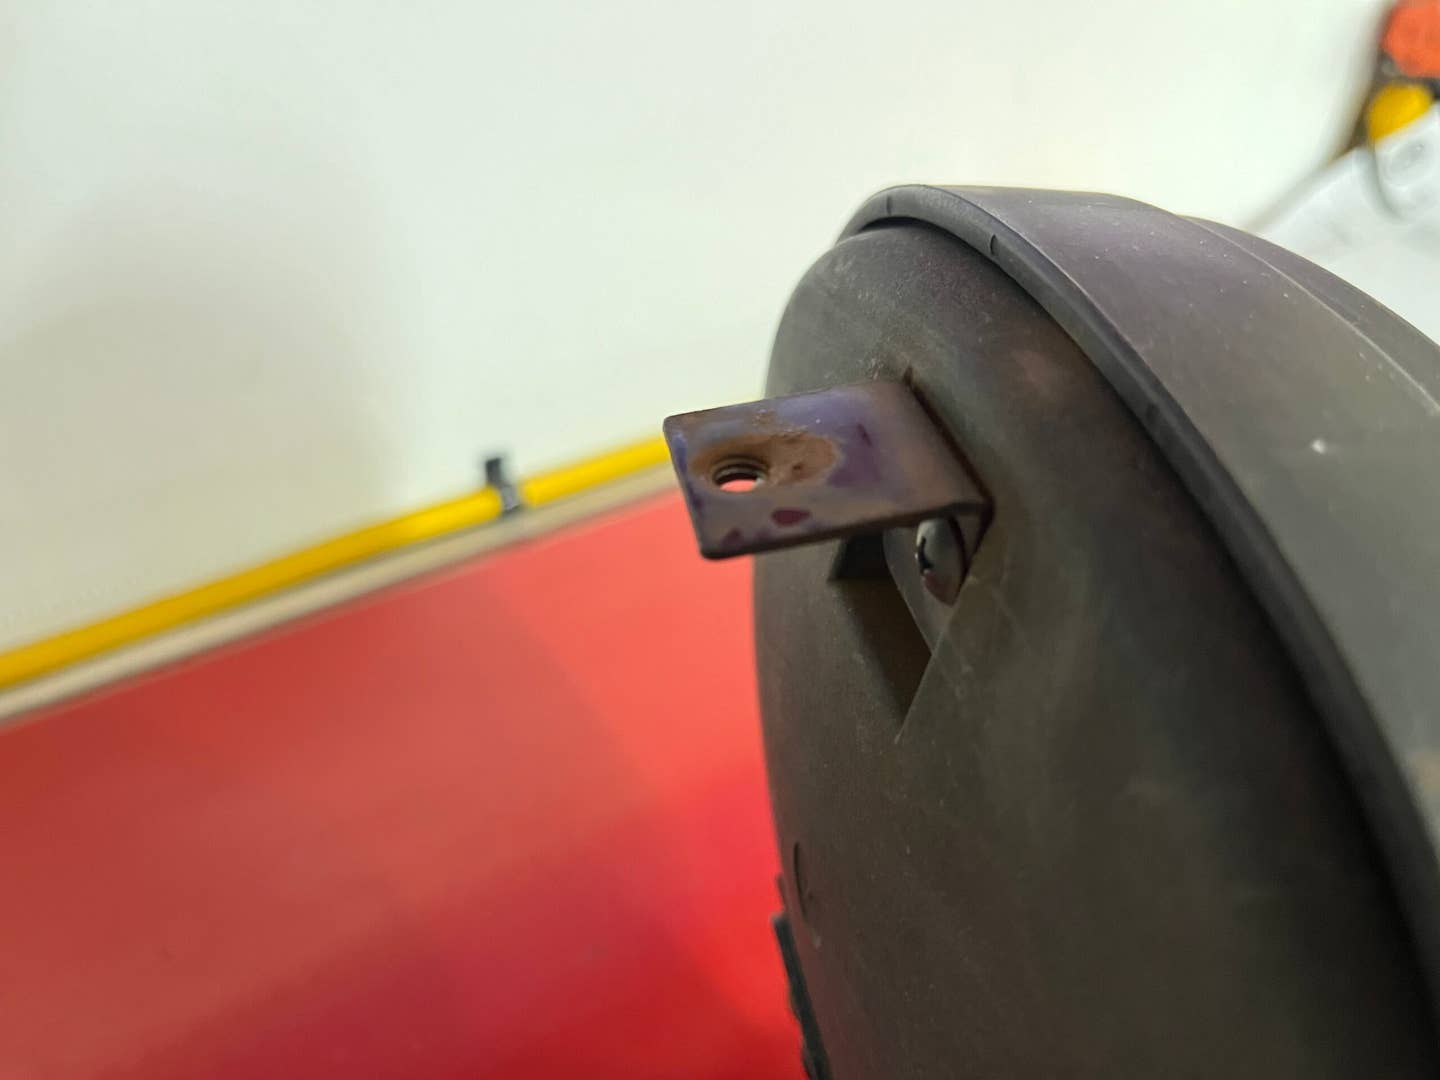
Two small plastic protrusions seemed to be obstructing the progress of the grille from fitting snugly; these were easily removed as well… but creating insufficient space for the grille. Darn!
At that moment, I understood that I had to either modify my bumper or devise an adapter for the grille. Alternatively, I could revert to the original configuration and use the JDM grille and lights as decorative pieces, which would be equally appealing.
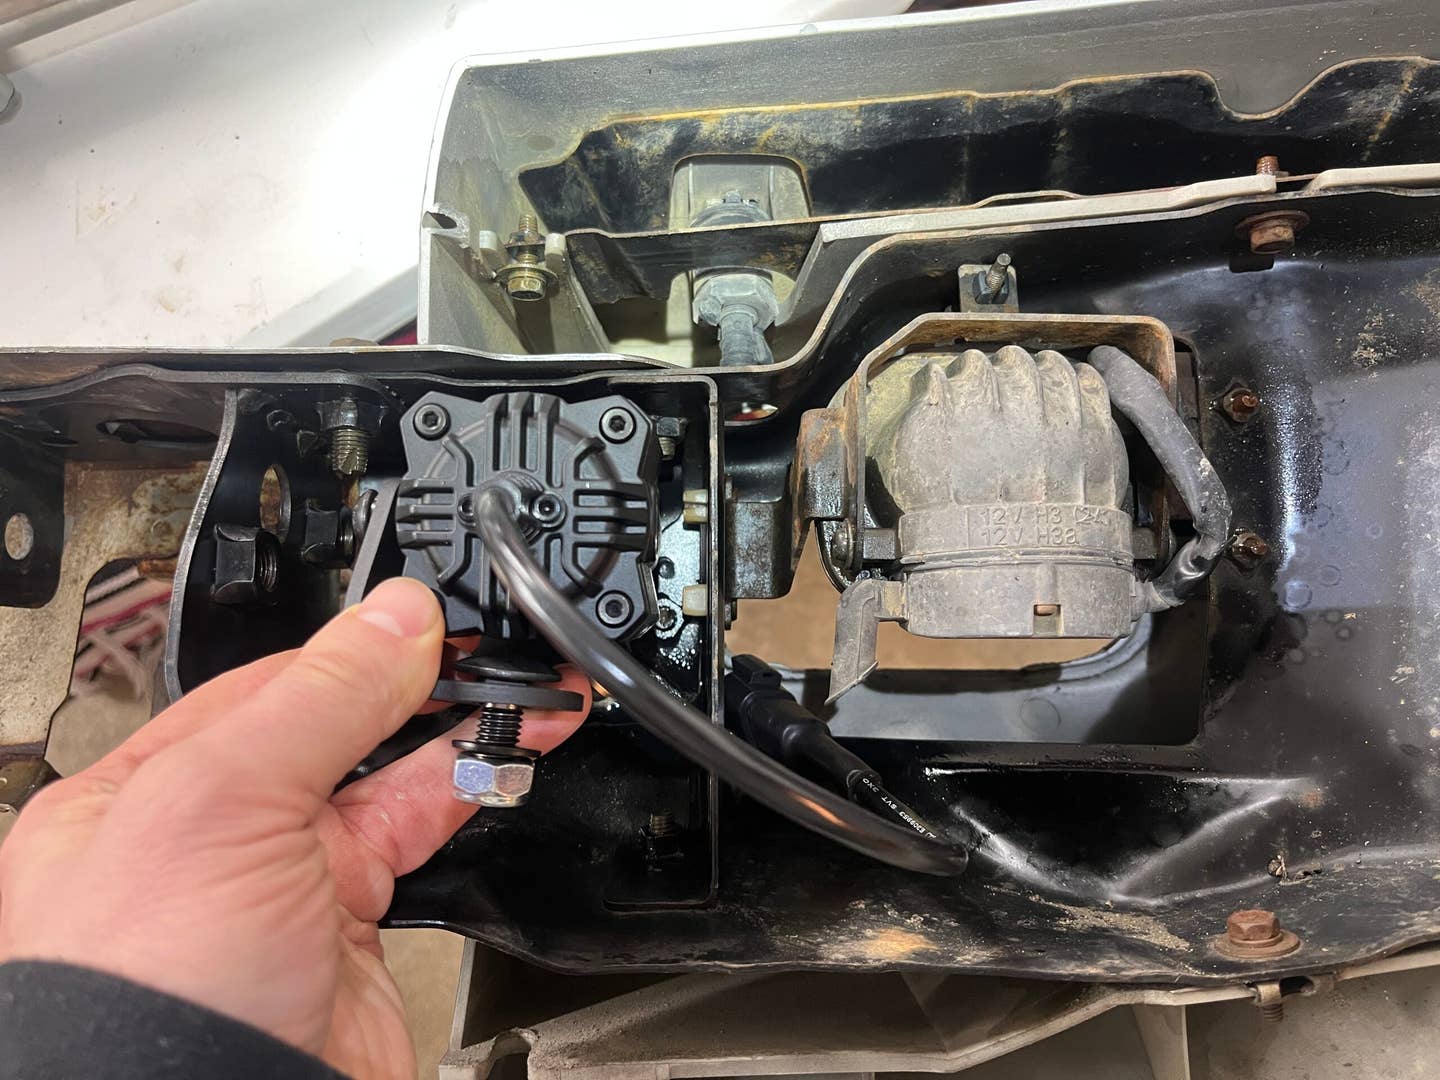
Setting that consideration aside, I directed my focus to the smaller set of lights that fit into the corners of the factory bumper. It is no surprise that the mounting bolt of the KC light does not align perfectly with the Montero’s existing light bracket. However, it appears feasible to drill a small hole and craft my own adapter without much difficulty. I am experienced in this area and have full confidence in overcoming this challenge.
The alignment of the JDM grille and USDM bumper up. Andrew P. Collins
The small metal tabs are obstructing the guard from fitting snugly against the bumper. Either it needs trimming or reshaping enough to fold in on itself. Andrew P. Collins
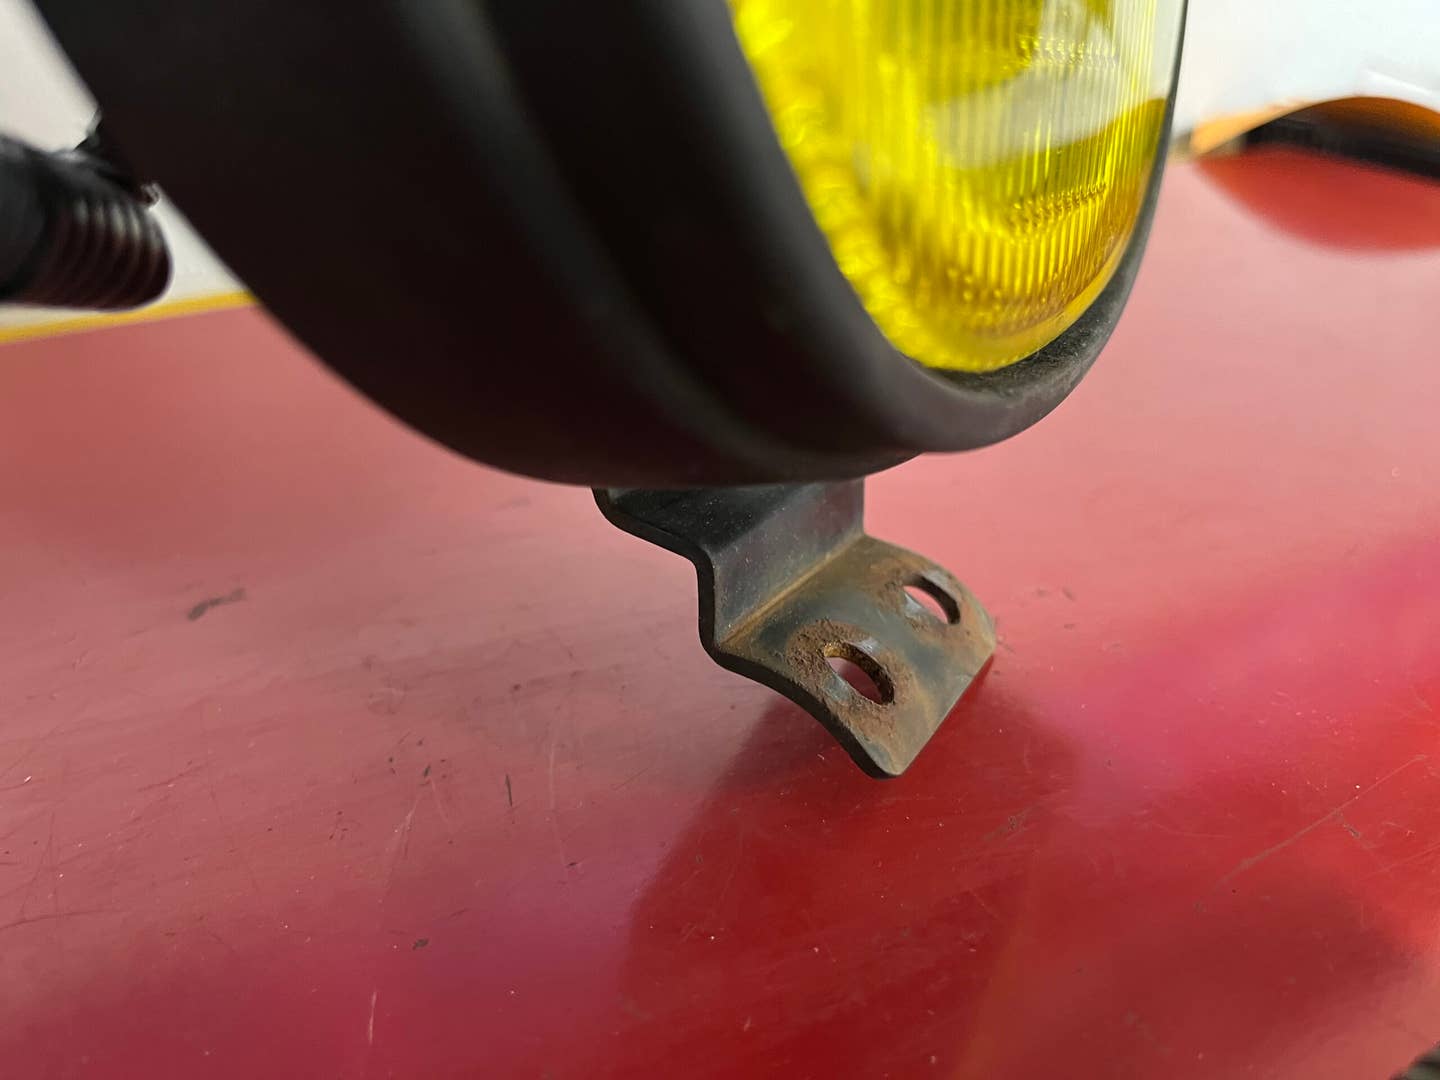
Clearly, the brush guard was meant to be secured with those bolts, but it doesn’t quite reach as-is. Andrew P. Collins
The original fog lights on this vehicle have never functioned for me due to the prior owner’s unconventional wire tampering for a now-removed aftermarket light setup. Typically, I’m dedicated to maintaining the vintage appearance of this vehicle and hesitant to swap factory fogs for modern LED ones. However, in this instance, the KCs will be predominantly hidden by the bumper and won’t disrupt the ’90s style of the truck.
I initiate the removal of the stock fog lights, which entails, you guessed it, the reapplication of penetrating fluid. I specifically chose to highlight WD-40 Specialist Penetrant with EZ-REACH for this task as it plays a critical role here!
Eliminating old fog lights proves to be a surprisingly challenging endeavor as they are typically secured with small rusty screws. This scenario is ripe for stripping screw heads, and employing a torch is infeasible due to proximity to plastic components. Penetrating fluid comes to the rescue—I soaked the retaining screws in penetrant and allowed them to marinate while devising my next steps.
In this image, you can observe that the KC FlexEra 1 is essentially equal in size to the OEM Montero fog light. Andrew P. Collins
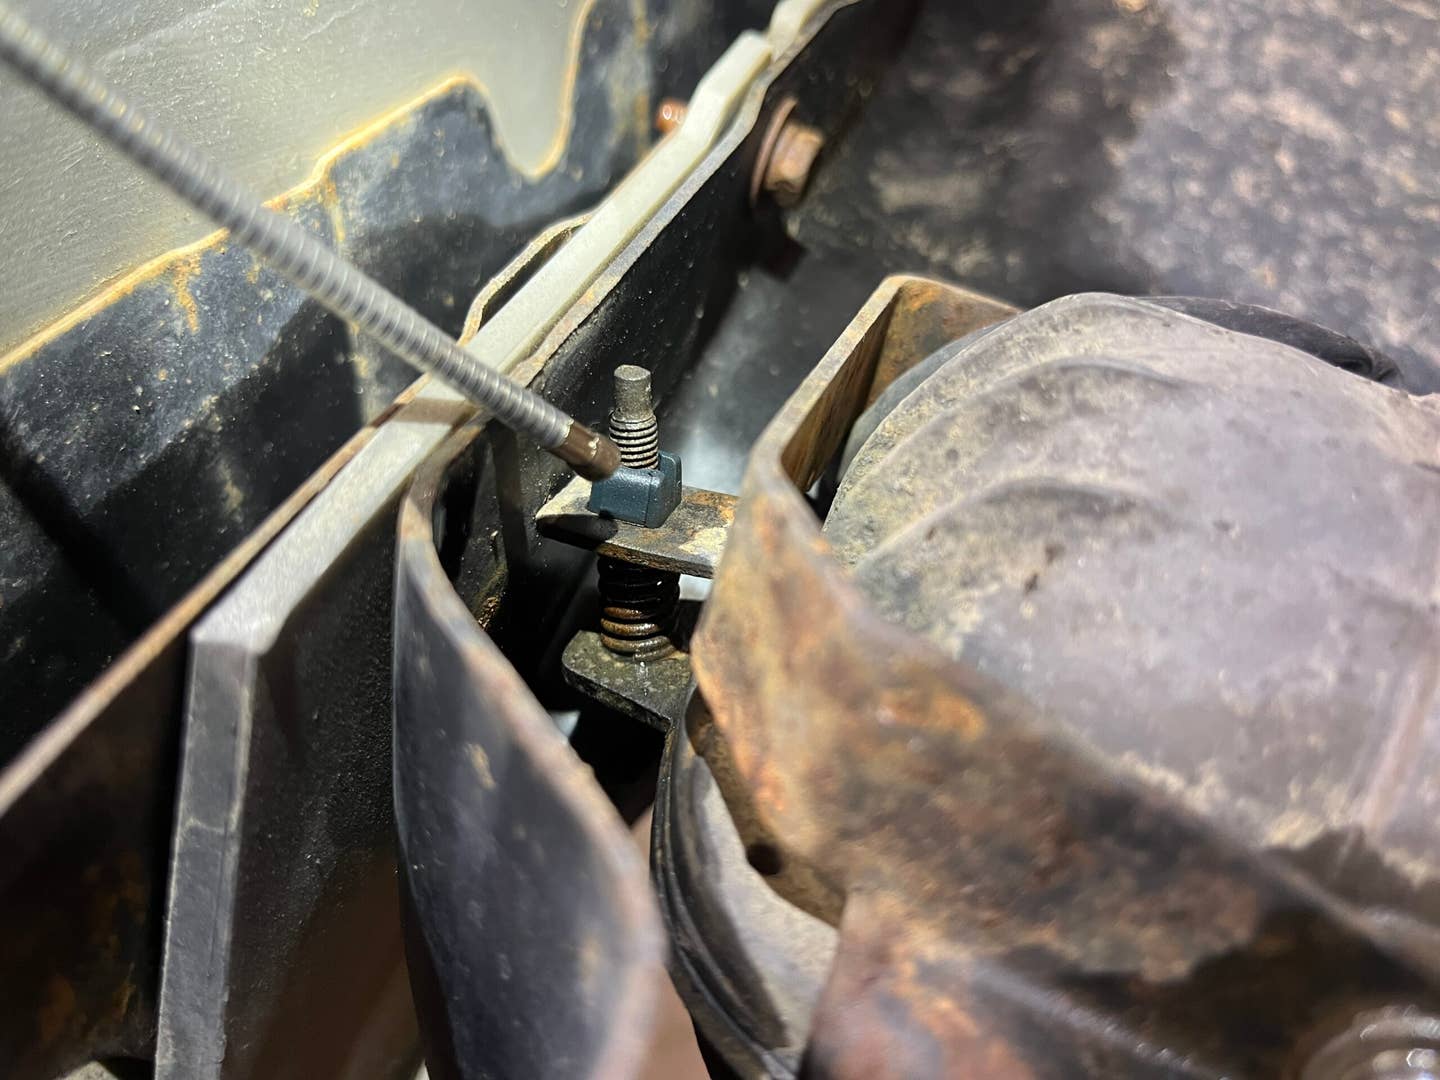
Even if you have no plans to uninstall your fog lights, applying penetrating fluid to any exposed light adjustment screws is highly recommended. This will prevent the spring from seizing up if and when adjustments are needed.
When light adjustment screws become rusted, they can be extremely challenging to adjust—a perfect scenario for the utilization of penetrating fluid. Andrew P. Collins
This ‘Bolt-On’ Project Turned Into an Engineering One
Trying out the brush guard on the bumper, even off the vehicle, proved a bit tiresome. Handling two large chunks of steel is quite unwieldy. Understanding that this isn’t a simple plug-and-play situation, I need to strategize my next move. Should I reinstall the original bumper and search for a complete JDM bumper to match the JDM brush guard? It might be costly. Alternatively, should I fabricate an adapter to mount the JDM brush guard onto the USDM bumper? This will require precision as the brush guard is heavy, making the mounting solution crucial. Improper fitting could result in increased damage in case of a front-end collision. Or perhaps I should abandon the idea, hang the Japanese piece on my wall (I already have a spot in mind), and stick with the stock setup along with the KC lights.
If I do opt for the Japanese bumper setup eventually, I’ll also need to figure out how to mount the lights on it. Initially, I assumed they would align perfectly since their mounting holes seemed to match those on the brush guard. However, upon closer examination, I noticed slight differences in the angles.
Andrew P. Collins
The lights I acquired are Mitsubishi factory-made from a similar era as my Montero. They feature a curved mounting base, probably designed for attachment to a cylindrical bar. To use them with my bumper, I could either create an adapter or adjust the mount’s shape. While not overly complex, this is a challenge that must be addressed. When it comes to mounting such large lights, ensuring a sturdy attachment is crucial. These lights will face significant wind resistance and might sway if not properly secured. Driving with loosely mounted lights is unpleasant for both yourself and other road users.
When considering how to mount the lights, I noticed that the mounting base is curved; however, I also observed a top mounting bolt that could provide additional stability. It appears to be able to attach to small tabs in the brush guard. Andrew P. Collins
At this juncture, I’ve spent considerable time contemplating and rearranging parts in close proximity, pondering without making much tangible progress. Indecision has been my primary obstacle—deciding whether these accessories should adorn my truck or serve as ornamental wall decorations.
I wouldn’t necessarily suggest engaging in improvised mechanical work like this for every project; however, sometimes merely reviewing diagrams, videos, and online discussions is insufficient. In the end, one may have to conduct some investigative disassembly—stripping away certain car components to discern precisely what’s necessary for a successful project.
Although I may still be somewhat undecided on the next steps, I did manage to disassemble the front portion of my truck easily with the appropriate tools!
To provide the best experiences, we use technologies like cookies to store and/or access device information. Consenting to these technologies will allow us to process data such as browsing behavior or unique IDs on this site. Not consenting or withdrawing consent, may adversely affect certain features and functions.
Functional
Always active
The technical storage or access is strictly necessary for the legitimate purpose of enabling the use of a specific service explicitly requested by the subscriber or user, or for the sole purpose of carrying out the transmission of a communication over an electronic communications network.
Preferences
The technical storage or access is necessary for the legitimate purpose of storing preferences that are not requested by the subscriber or user.
Statistics
The technical storage or access that is used exclusively for statistical purposes.The technical storage or access that is used exclusively for anonymous statistical purposes. Without a subpoena, voluntary compliance on the part of your Internet Service Provider, or additional records from a third party, information stored or retrieved for this purpose alone cannot usually be used to identify you.
Marketing
The technical storage or access is required to create user profiles to send advertising, or to track the user on a website or across several websites for similar marketing purposes.